
Make a fun pop-up turkey card for Thanksgiving with simple paper shapes, accordion folds, and a handwritten message for someone special.
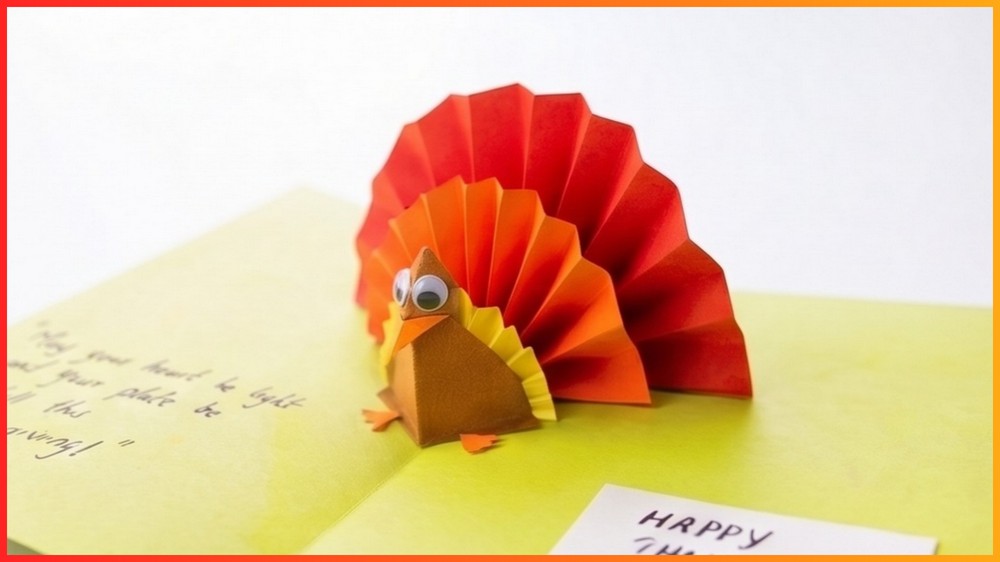
Thanksgiving is a lovely time to send a little extra thought to someone you care about. A handmade card makes that message feel even more personal, especially when the card has a surprise waiting inside.
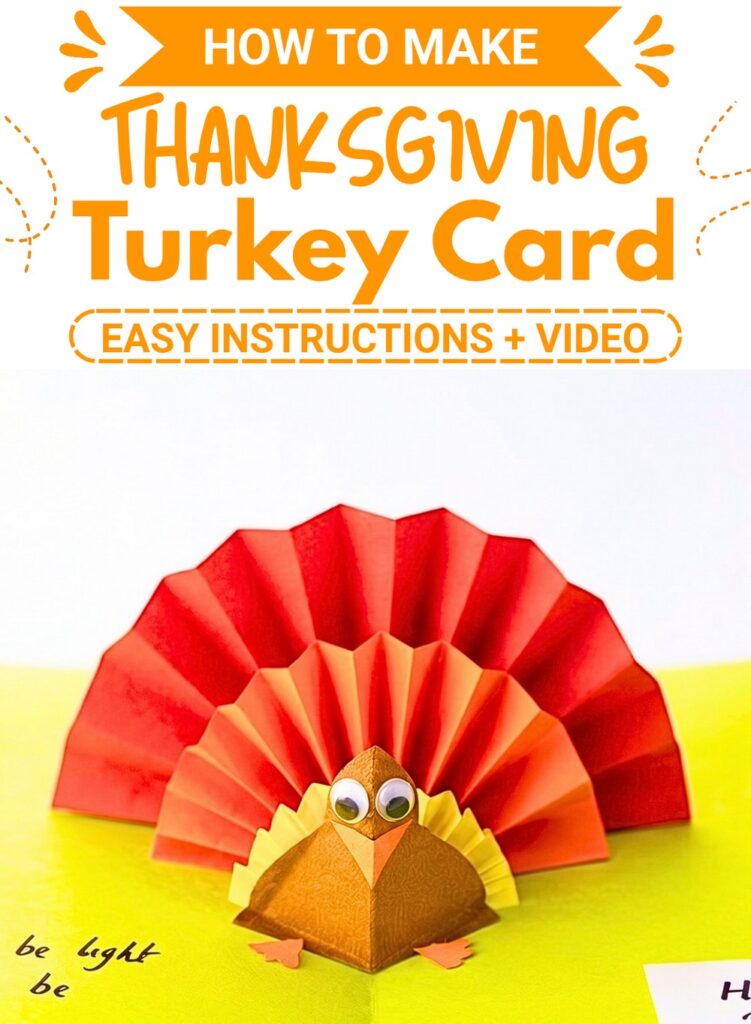
This pop-up turkey uses simple paper shapes and accordion folds to create a layered tail that opens with the card. The turkey itself is made from a small paper cone, so there is no complicated cutting or drawing needed for the body.
The part that deserves the most attention is the pop-up arrangement. Each feather fan needs to sit along the card’s center fold in a way that lets the card open fully and close without forcing the paper. Checking that movement as you build the layers makes the finished card much easier to handle.
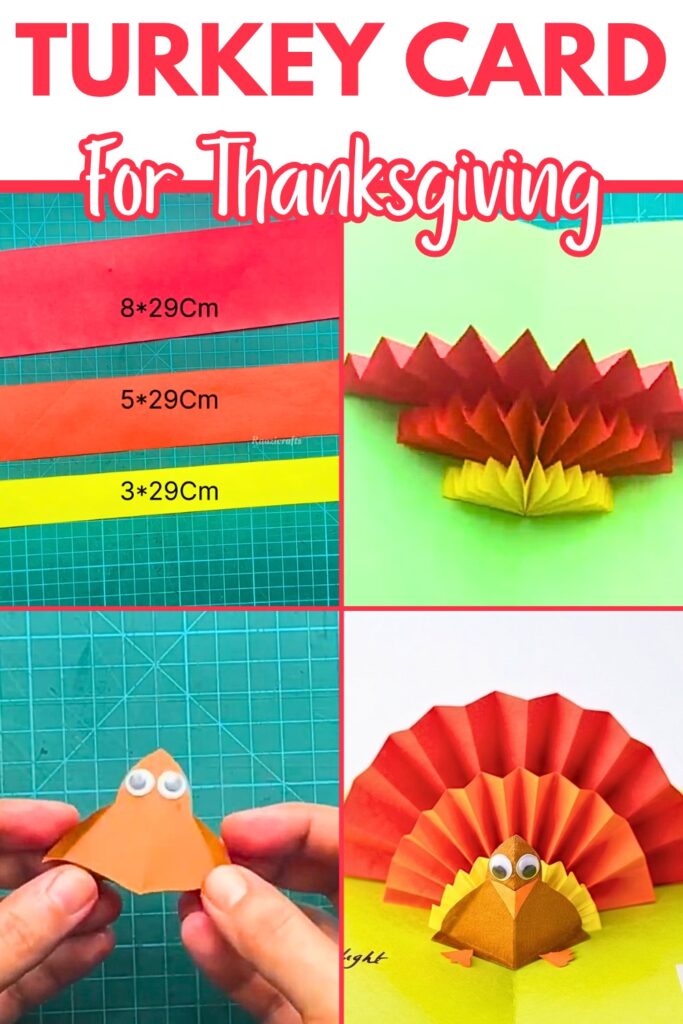
Once the turkey is assembled, you can finish the card with a simple Thanksgiving greeting and a longer handwritten note. The colors can stay traditional or become as bright and playful as you like.
Things that you need before crafting:
- Green craft paper: For the folded card base
- Dark red paper: For the largest feather fan
- Light red or orange paper: For the middle feather fan and turkey details
- Yellow paper: For the smallest feather fan
- Brown paper: For the turkey body
- White paper: For the inside greeting
- Glue: A glue stick or liquid craft glue
- Scissors
- Compass: Or a small round object for tracing
- Pen or marker: For the written message and beak detail
- Googly eyes
How To Make:
Start With the Layered Turkey Feathers
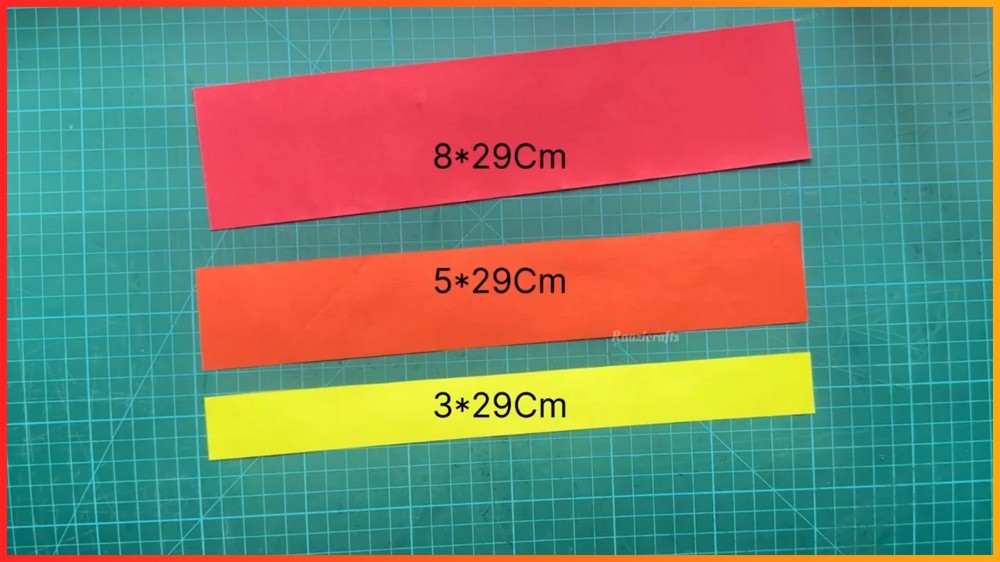
The turkey’s tail is made from three accordion-folded paper strips. Making three different widths gives the finished feathers a layered appearance without needing complicated shapes.
For the feather strips, use these measurements as a guide:
- Dark red: 8 × 29 cm
- Light red or orange: 5 × 29 cm
- Yellow: 3 × 29 cm
You can adjust the size if you are making a different-sized card, but keeping the three strips at different widths helps the colors remain visible when the fans are layered.
1. Accordion-fold the paper strips
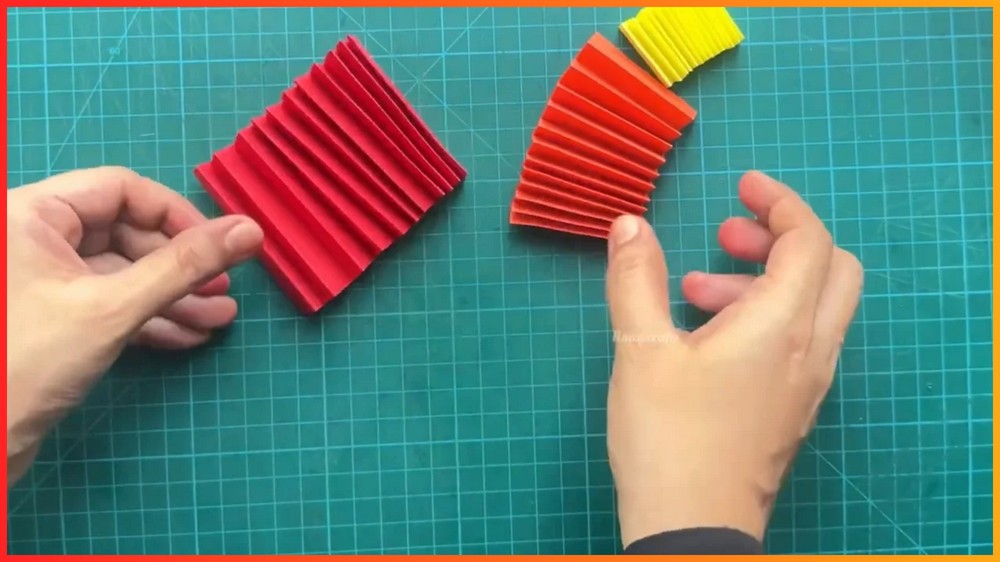
Take one strip and make a small fold at one end. Turn the paper over and make the next fold in the opposite direction. Continue alternating the direction of the folds until you reach the other end.
Try to keep the folds reasonably even. They do not need to be mathematically perfect, but large differences between the folds can make the finished fan uneven.
Repeat with the other two strips.
2. Turn each strip into a fan
Fold each accordion strip in half.
Apply glue to the inner edges where the two halves meet, then press them together. The folded strip will open into a fan shape.
Make all three fans before moving on. You should now have a small yellow fan, a medium light-red or orange fan, and a larger dark-red fan.
Shape the Turkey’s Body
The turkey sits in front of the smallest feather fan, so its body can be made separately before the pop-up layers are attached to the card.
3. Cut a circle from brown paper
Take a small rectangular piece of brown paper, about 4.5 × 6 cm.
Use a compass or a small circular object to trace a circle onto the paper. Cut it out carefully.
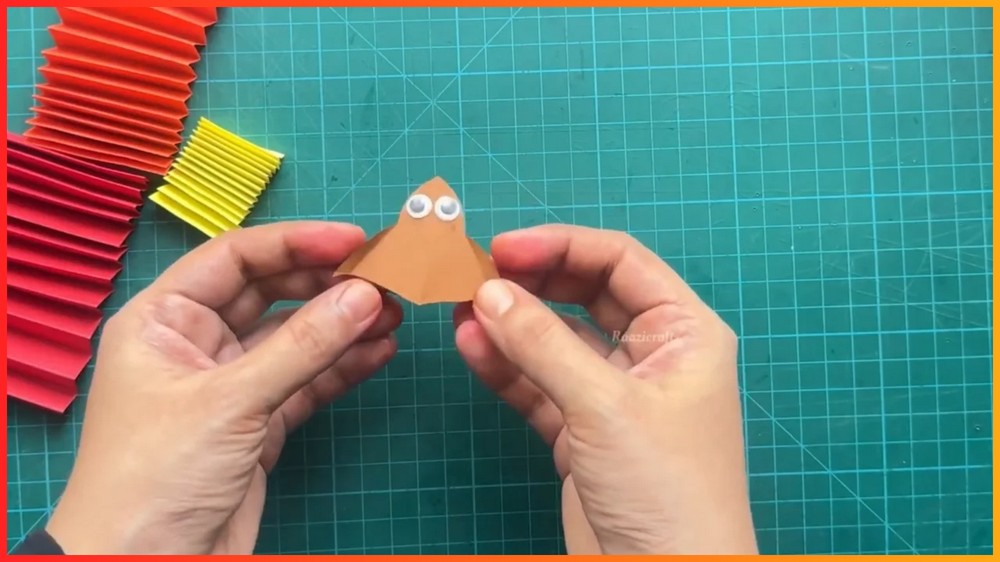
The circle will become the turkey’s rounded cone-like body.
4. Fold the circle into a cone
Bring part of the circle inward to form a wide cone or triangular shape. Overlap the edges slightly and glue them together.
Hold the join for a moment so it stays in place while the glue begins to set.
Add two googly eyes near the top. At this stage, the turkey should already start to look like a little character rather than just a paper shape.
Build the Pop-Up Inside the Card
Now the separate pieces come together.
5. Fold the card base
Take the green craft paper and fold it in half to make the card.
Open it back up and place it flat with the center crease clearly visible. This crease is important because the feather fans will be attached along it.
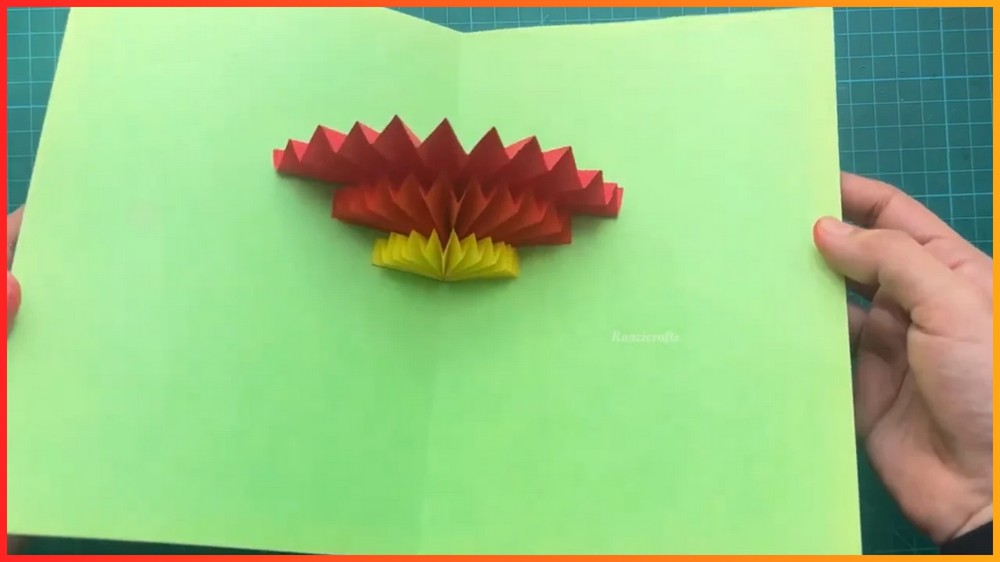
6. Attach the smallest yellow fan
Place the yellow fan at the center crease.
Glue its flat bottom edges to the crease area so the fan can open upward when the card opens.
Before the glue sets completely, gently close the card. The fan should fold naturally toward the inside rather than catching against the card edges. Open it again and make sure the fan returns to its upright shape.
This quick movement check is worth doing now because once the other feather layers are added, it becomes harder to reposition the bottom fan.
7. Add the middle feather fan
Position the medium red or orange fan behind the yellow one.
Glue it to the yellow fan and to the appropriate area of the card so the three layers will spread outward rather than bunch together.
Again, carefully close the card partway and reopen it.
If the paper catches, folds awkwardly, or pushes against the card, adjust the fan before adding more glue. A pop-up card works best when the folded pieces have enough freedom to move with the card instead of being held too tightly.
8. Finish with the largest fan
Place the dark-red fan behind the medium fan.
Glue it in position to create the widest layer of the turkey’s tail.
Give the card another gentle open-and-close test. This is the final opportunity to correct the feather placement before the glue dries fully.
Once the three fans move together smoothly, leave the glued areas to dry.
Give the Turkey Its Face and Feet
With the feather layers in place, the little turkey can be finished.
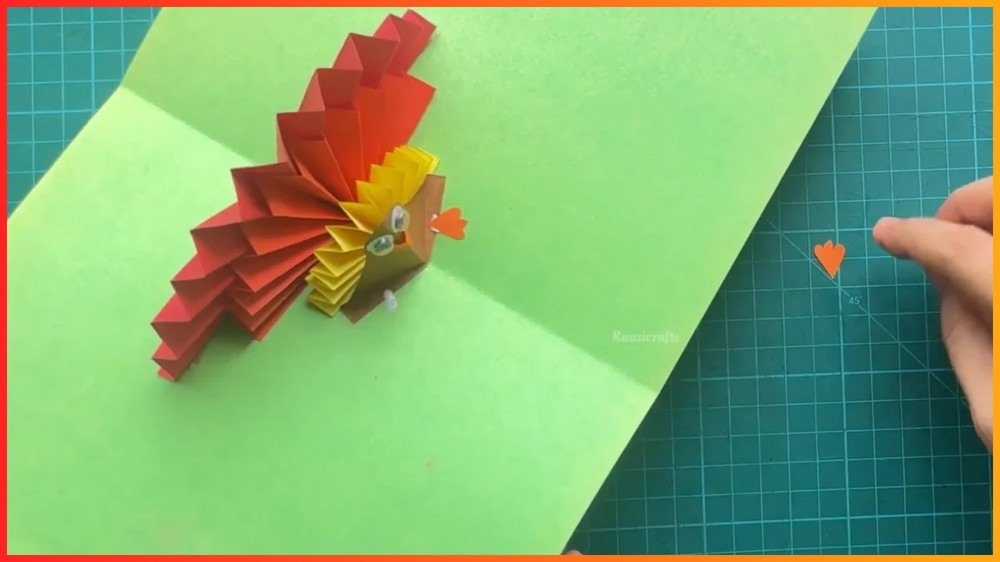
9. Add the beak
Cut a tiny diamond from orange paper.
Fold the diamond in half and glue it below the googly eyes, leaving the folded edge facing outward to give the beak a little dimension.
If needed, use a pen or marker to add a small detail to the beak.
10. Add the feet
Cut two small, simple foot shapes from orange paper.
Glue them near the bottom of the brown turkey body.
Keep the pieces small enough that they do not interfere with the movement of the pop-up feathers.
11. Attach the turkey body
Glue the brown turkey body to the center of the yellow fan.
Place it where the yellow layer remains visible around the turkey while the larger red and dark-red fans frame it from behind.
Let the glue dry before repeatedly opening and closing the card.
Add the Thanksgiving Greeting
The inside of the card can now be personalized.
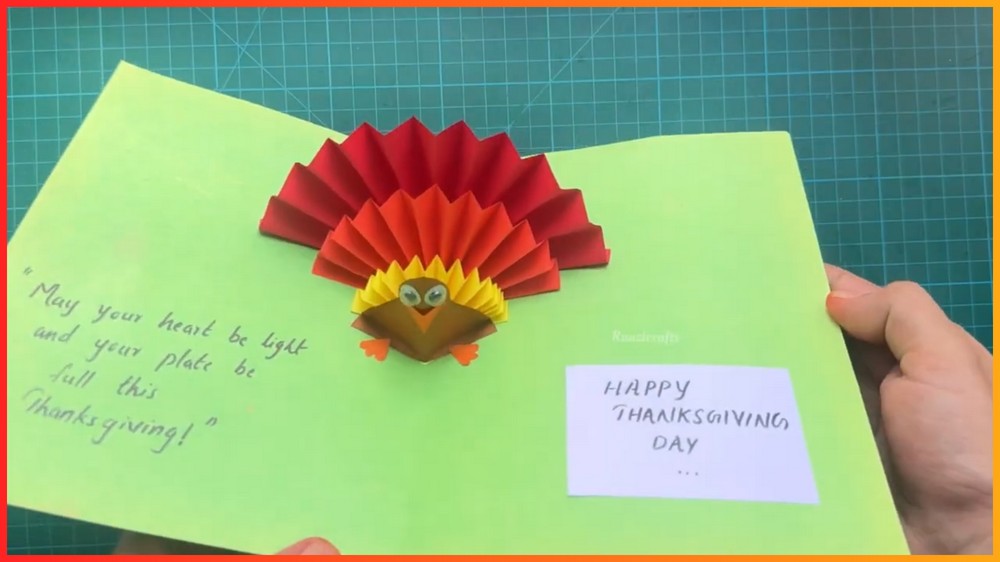
Cut a small rectangle of white paper, about 5 × 7 cm, and write “Happy Thanksgiving Day” or another greeting on it.
Glue the white paper inside the card.
On the opposite side, write a longer message for the recipient. This is a nice place to add something personal rather than keeping the card limited to a printed-style greeting.
Make the Card Your Own
You can change the personality of the turkey without changing the basic method.
Try different feather colors
Traditional red and yellow look festive, but patterned paper or brighter colors can make the turkey more playful.
Change the message
Instead of only writing “Happy Thanksgiving,” add a short joke, a few words about what you are grateful for, or a personal note to the person receiving the card.
Add paper texture
Different papers can give the feather layers a different appearance. You can experiment with lightweight textured papers as long as they can still be folded into the accordion fans and open with the card.
Note: If you face any hurdles in creating this project, then you can watch the tutorial here.
A Few Things to Check Before Giving the Card
- The accordion folds: Keep them reasonably even so each fan opens neatly.
- The center crease: Make sure the pop-up fans are positioned along the card’s fold rather than noticeably off to one side.
- The card movement: Open and close the card gently after each feather layer is added.
- The glue: Use a thin layer. Too much liquid glue can soften or wrinkle the paper.
- Drying time: Allow the glued pieces to set before repeatedly opening and closing the card.
The finished card has a fun surprise inside: the layered paper feathers spread open as the recipient opens the card, with the little turkey sitting in the center. A handwritten Thanksgiving message makes the whole card feel personal and cheerful.

[…] A simple paper cup can become much more than something used at the table. With colorful paper, a few cut shapes, and some glue, it can turn into a cheerful turkey ready for Thanksgiving decorating. […]