
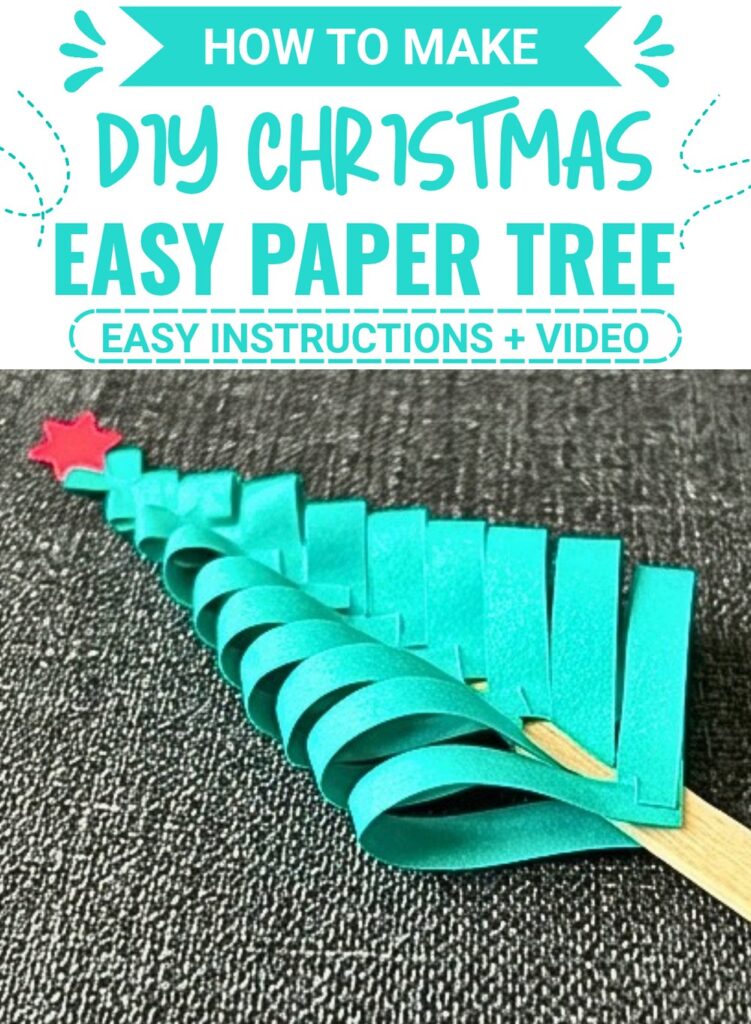
Make a textured paper Christmas tree from one square sheet, with easy cutting and folding steps for creating neat loops, a balanced shape, and a simple popsicle-stick trunk.
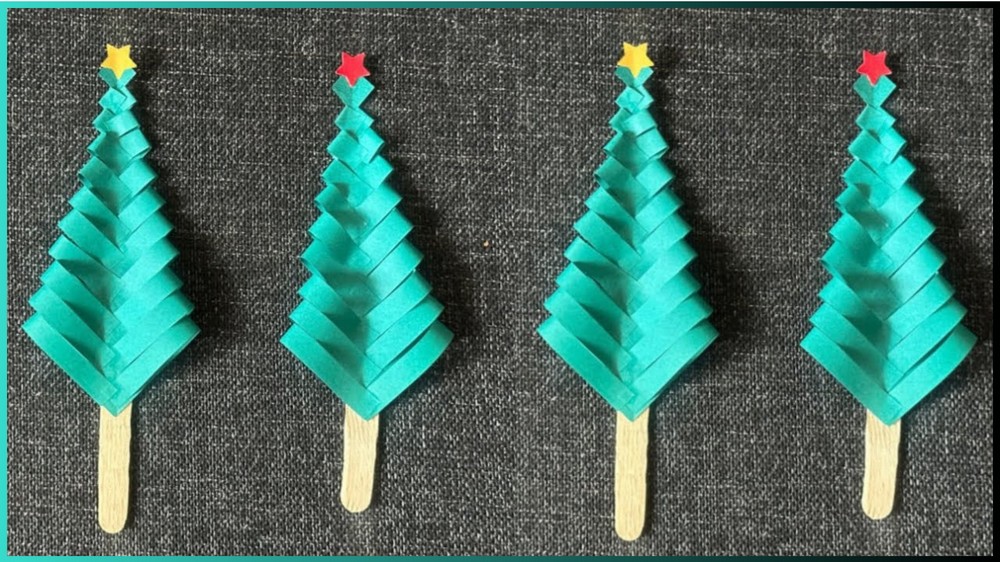
A flat square of paper can take on a surprisingly detailed shape with just a few cuts and folds. In this Christmas tree craft, the paper is first folded into a triangle, cut into strips, and then shaped into layered loops that give the tree its full, textured appearance.
The most important part happens before the folding begins. The cutting lines need to stop short of the folded edge so the strips remain connected along the center. If that margin is cut through, the pieces can separate and the tree will no longer have the connected shape needed for the next step.

Once the cutting is done correctly, the rest of the craft is mainly about folding each strip inward and securing it in sequence. A craft stick becomes the trunk, while a small paper star gives the finished tree its Christmas-tree silhouette.
Things that you need before crafting:
Gather these simple supplies:
- Green paper: One square, approximately 10 × 10 cm
- Popsicle stick or craft stick: For the trunk
- Small paper star: For the topper
- Craft glue
- Scissors
- Ruler
- Pencil
Light or medium-weight paper is easier to fold into the small loops than very thick cardstock.
How To Make:
Fold the Square Into a Cutting Shape
Begin with your 10 × 10 cm square of green paper.
Fold it diagonally in half by bringing two opposite corners together. Press along the fold so you have a neat triangle.
Take a moment to check the fold before drawing your cutting lines. The two sides should meet cleanly rather than leaving a noticeably uneven edge.
The folded edge will act as the connected center or “spine” of the tree, so keep track of it throughout the next step.
Mark the Strips Before Picking Up the Scissors
Position the folded triangle with the folded edge on the left.
Use your ruler and pencil to mark a series of diagonal lines across the triangle. Keep the lines reasonably evenly spaced so the finished branches have a consistent rhythm.
The lines should run from the open side toward the folded side, but stop before reaching the folded edge.
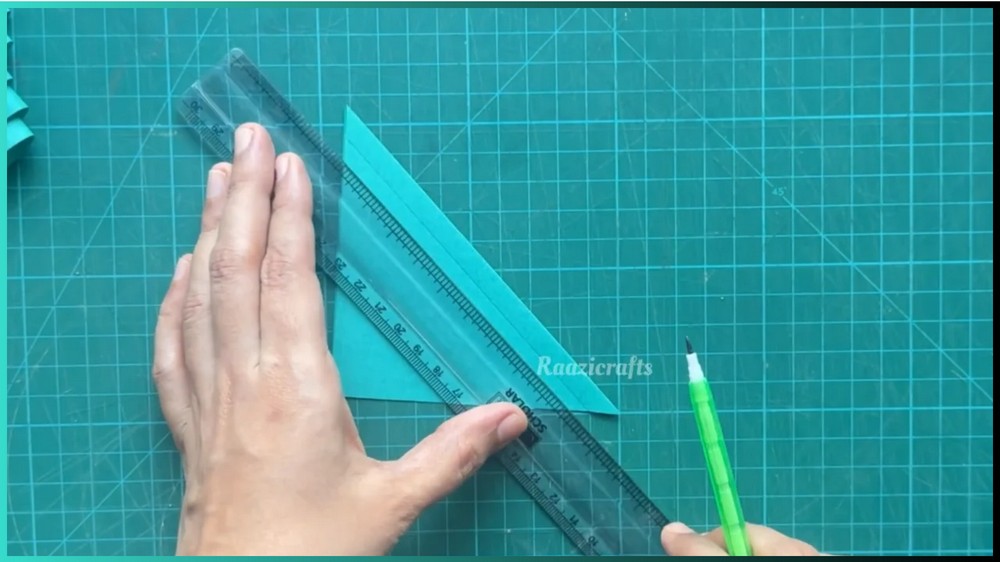
The one check that prevents the biggest mistake
Before cutting, trace your finger along the folded edge.
Make sure there is a continuous strip of uncut paper running along it.
That margin is what keeps all the future branch sections connected. If your pencil guidelines reach the fold itself, shorten them before making any cuts.
It is much easier to correct the marks now than to discover after cutting that one section has been separated.
Cut the Branch Strips
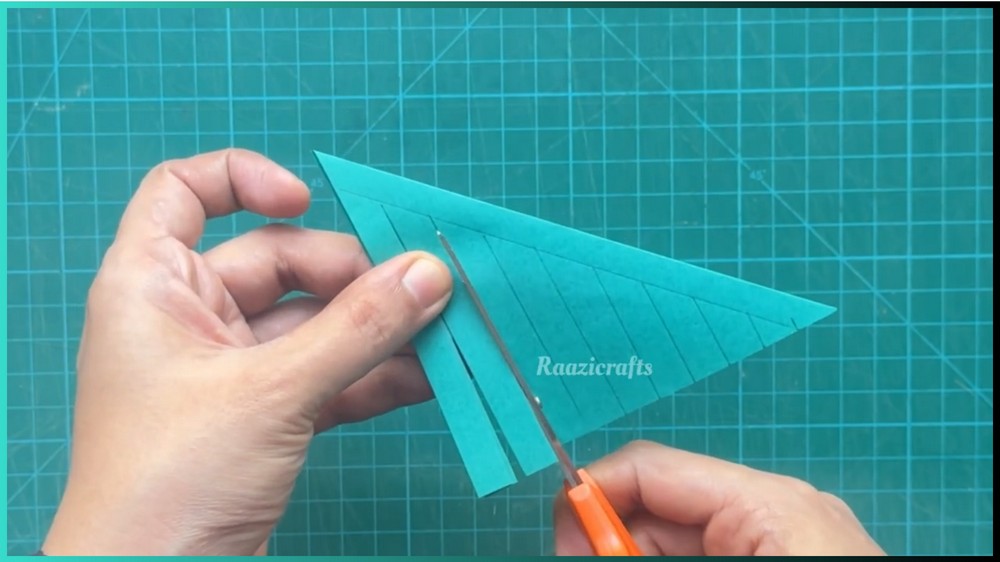
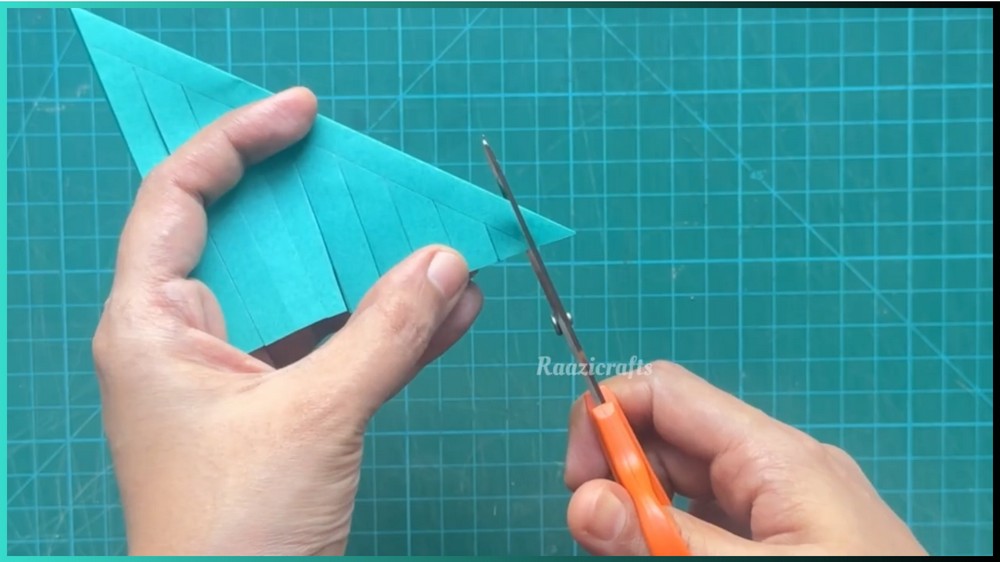
With the triangle still folded, carefully cut along each pencil guideline.
Start at the open edge and cut toward the margin, stopping before the folded spine.
Try to keep your scissors following the drawn lines rather than making each cut freehand. Consistent cuts will help the finished loops look more balanced.
Do not cut beyond the stopping point.
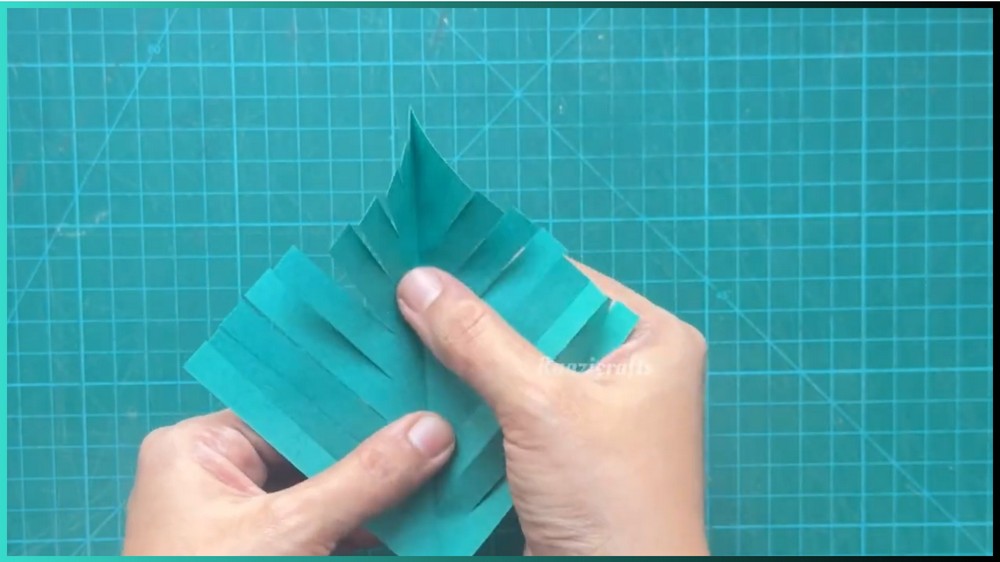
After completing the cuts, gently unfold the paper.
You should now have a diamond-like sheet with a series of connected strips extending toward the center.
Turn the Cut Strips Into Loops
Now the flat paper begins to resemble a tree.
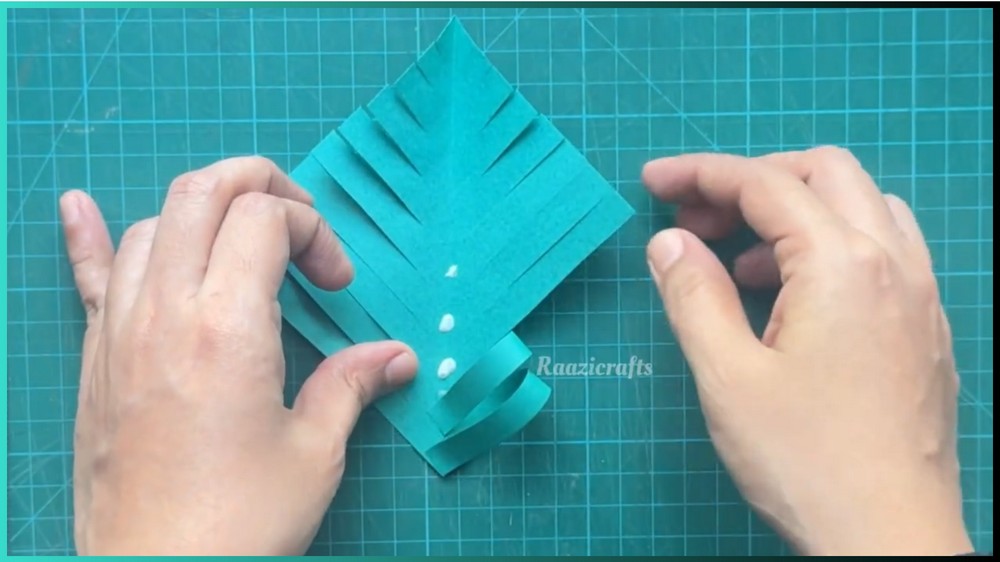
Place a small amount of glue near the center spine where the first folded section will be secured.
Take the top loop on one side and bring it inward toward the center. Secure it with the glue.
Then move to the corresponding section on the other side.
Continue working downward, alternating from one side to the other and folding each strip inward to create the layered branches.
Why the alternating order helps
Working from side to side helps you keep the tree visually balanced.
If you complete several loops on only one side before moving to the other, it becomes harder to judge whether the two sides are developing evenly.
You do not need to make every loop identical, but the overall tree should gradually widen toward the lower portion.
If a loop looks too loose, gently reposition it while the glue is still workable. If the paper begins to wrinkle, use less adhesive rather than pressing more glue into the fold.
Let the Shape Develop From Top to Bottom
Continue folding and securing the strips until you reach the bottom.
As you work downward, the layered sections should build the textured evergreen appearance.
Keep checking the silhouette rather than concentrating only on the individual loops.
From time to time, look at the tree from directly in front. If one side appears significantly fuller, adjust the next few loops to restore the balance.
This is easier to do while the glue is still setting.
Trim the Bottom Edge
Once all the loops are secured, look at the lower portion of the paper.
Trim away excess paper as shown in the tutorial, creating a neat base that can be attached to the craft-stick trunk.
Make the cuts gradually. You can always remove a little more paper, but you cannot put a trimmed section back.
The finished bottom should look tidy and provide a clear area for mounting the trunk.
Add the Popsicle-Stick Trunk
Apply glue to the upper portion of a popsicle stick or craft stick.
Position it against the back of the paper tree, aligning it with the center of the lower section.
Press the paper firmly against the stick for a moment so the adhesive can grip.
Do not move the tree around immediately after attaching the trunk. The stick acts as the support for the finished shape, so a secure bond is important.
Finish With a Paper Star
Cut out or punch a small decorative star.
Place it at the top tip of the tree and glue it in position.
A contrasting color will make the topper stand out against the green paper, while a simple white, yellow, or metallic-looking paper can give the tree a classic holiday appearance.
Allow the glued areas to dry before handling the finished decoration.
Make the Same Tree in Different Styles
The folding and cutting technique can stay the same while the appearance changes considerably.
Try:
- Traditional green: Keep the tree simple with a contrasting star.
- Pastel: Use soft colors for a lighter holiday display.
- Patterned paper: Let the paper design provide most of the decoration.
- Sparkly: Add small decorative pieces or a light touch of glitter after the tree is assembled.
If you change the paper size, remember that the proportions of the finished tree will change too. For a first attempt, starting with the approximately 10 × 10 cm square makes it easier to follow the supplied tutorial.

Note: If you face any hurdles in creating this project, then you can watch the tutorial here.
Use Your Paper Trees in Holiday Displays
The finished tree has a flat paper body with a craft-stick trunk, making it useful for a variety of seasonal decorations.
A larger version can become part of a tabletop display, while a smaller version can be incorporated into a handmade card or another paper decoration.
You can also make several trees in different colors and sizes to create a small collection rather than relying on one identical shape.
The key is to keep the folded spine uncut and make the branch cuts evenly enough that the loops can be folded and arranged into a balanced tree.

Save this pin for future!

[…] handful of square paper pieces can become a surprisingly dimensional Christmas decoration. This 3D paper star is made from eight individual folded modules, which are connected one after […]
[…] handmade Christmas tree does not have to start with a large collection of supplies. With paper, scissors, glue, and a few […]