
Add a cozy Thanksgiving touch with an easy felt pie coaster, using simple layering and lattice-folding tips to create a neat fruit-filled center and clean crust edge.
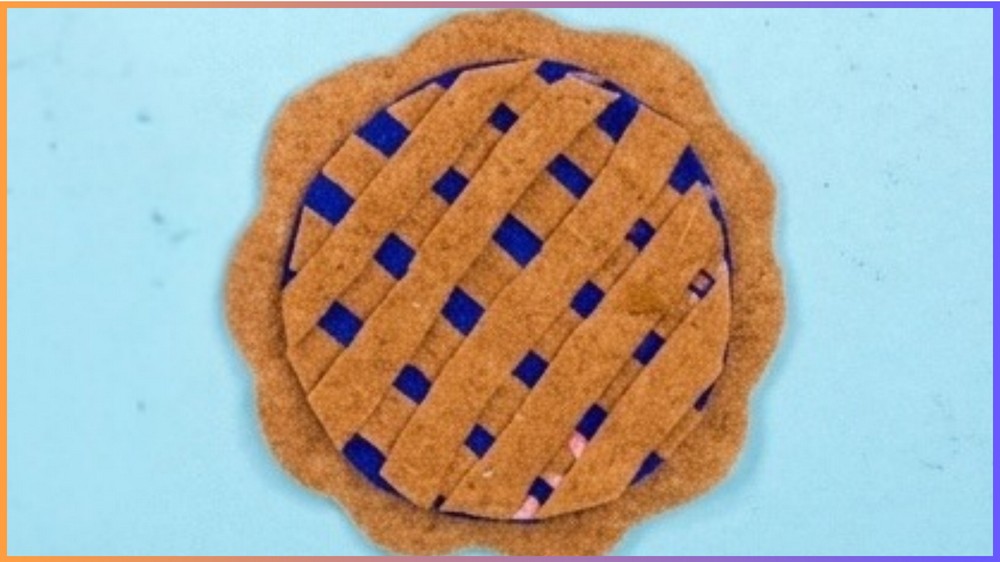
A Thanksgiving table can feel festive without being covered in complicated decorations. These felt pie coasters add a playful homemade detail while giving you a useful place to set a drink during the holiday season.
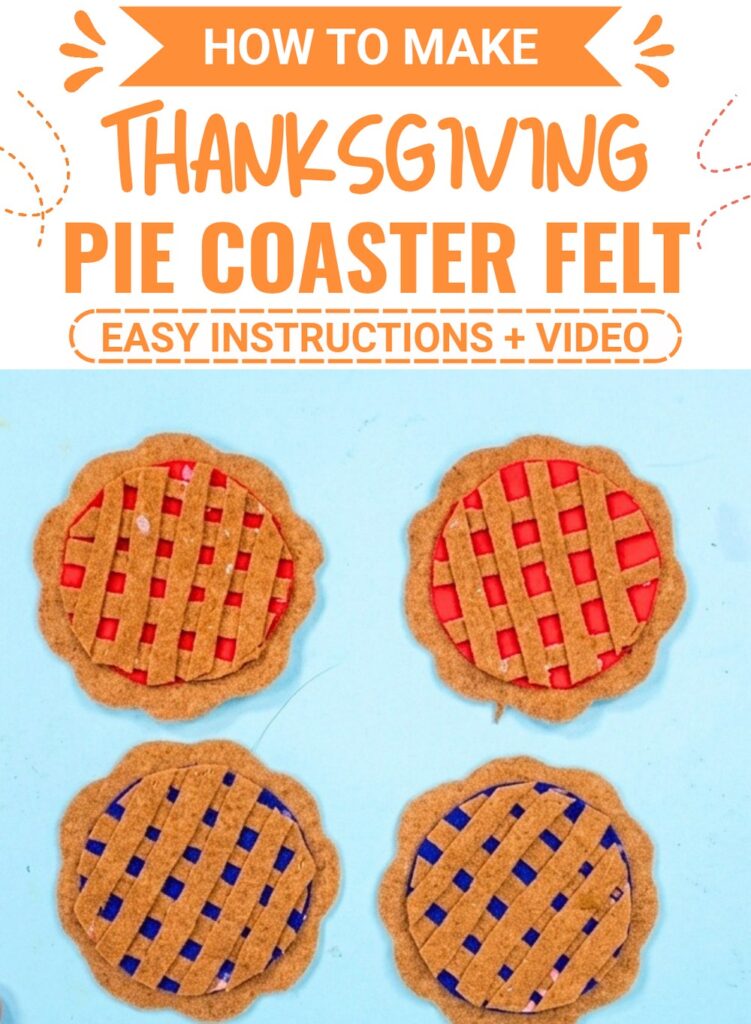
The design is inspired by a miniature fruit pie, with a brown felt crust, colorful filling, and a crisscross lattice topping. The materials are simple, but the finished layers give the coaster much more character than a plain felt circle.
The trickiest part is the lattice. The strips need to cross in opposite directions and stay within the filling circle so the finished center can be trimmed into a clean shape. Taking a moment to arrange the strips properly before adding too much glue makes the later trimming much easier.
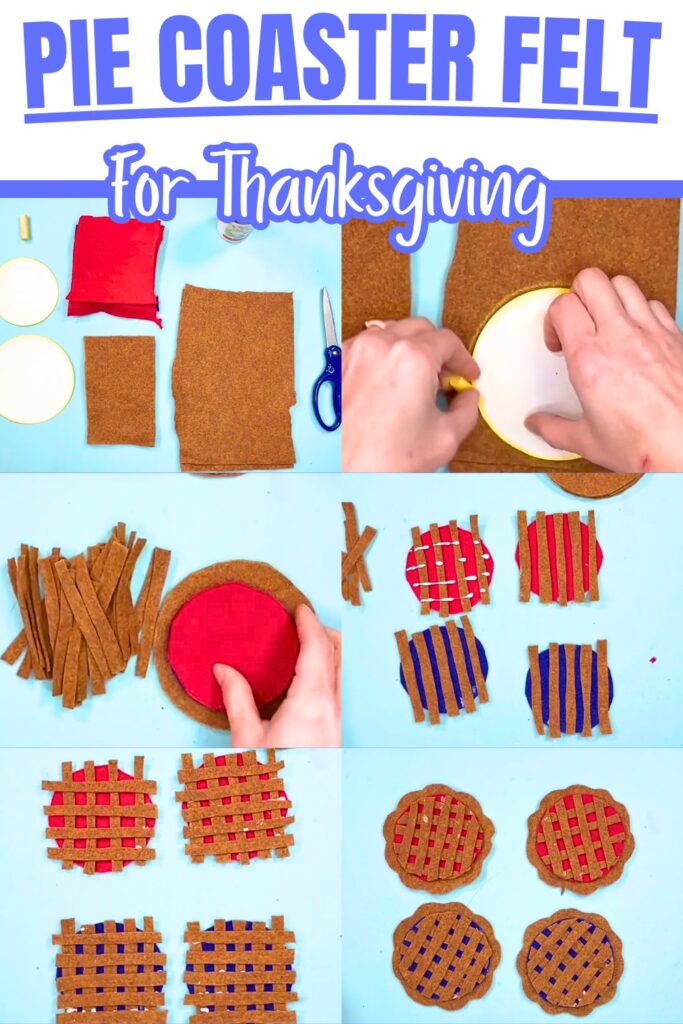
You can keep the filling red or blue for a classic fruit-pie appearance, or change the color to create pumpkin, lemon, cherry, or berry-inspired versions.
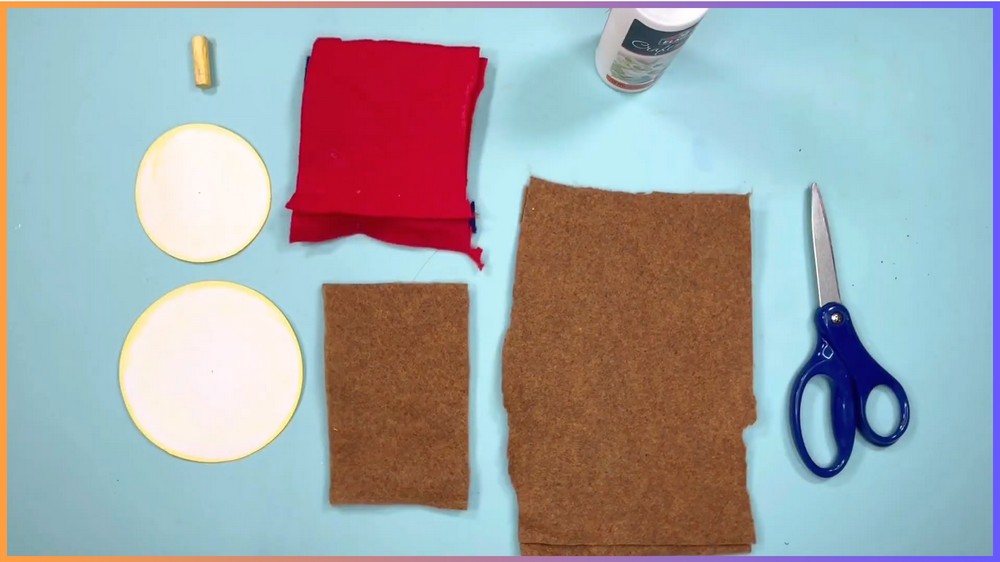
Things that you need before crafting:
For each felt pie coaster, prepare:
- Brown felt for the crust and lattice strips
- Red, blue, or another colorful felt for the pie filling
- Chalk, marker, or fabric pencil
- A circle template or round household object
- Craft glue or a hot glue gun
- Sharp crafting scissors
- A few extra pieces of brown felt for additional lattice strips
The exact amount of felt depends on the size and number of coasters you want to make. Use your chosen round object as the guide for keeping the crust and filling circles consistent.
The Key Detail: Build the Lattice on the Filling First
The pie center is assembled separately before it is attached to the larger crust.
This is important because the lattice needs to be glued, allowed to dry, and trimmed around the colored filling before the whole piece is placed onto the brown base.
If you attach the filling to the crust first and then try to build the lattice, it becomes harder to work neatly without getting glue onto the outer crust.
Keeping the decorated filling separate gives you much better control over the small strips.
How To Make:
1. Trace the Two Main Circles
Place your round template or household object on the brown felt and trace around it.
This large brown circle will become the pie crust.
Next, trace another circle on your colored felt. This smaller piece represents the fruit filling.
Try to keep the colored circle smaller than the brown crust circle so a visible brown border remains around the finished pie.
Why make the circles separately?
The brown circle creates the outer crust, while the colored circle gives you a defined area for the lattice. Keeping those two pieces separate makes the final layering much cleaner.

2. Cut Out the Felt Circles
Carefully cut around the traced lines.
For a neat result, keep your scissors moving smoothly instead of making lots of tiny cuts around the curves.
If your felt is thick, use sharp scissors. Dull scissors can compress the material while cutting and leave a rough or uneven edge.
Cut both the brown crust circles and the colored filling circles you need.

3. Prepare the Lattice Strips
Take another piece of brown felt and cut it into long, narrow strips.
These strips will become the pie’s woven-looking topping.
For the version described in the tutorial, plan on roughly 10 strips per coaster, although the actual number can vary depending on how wide you cut the strips and how closely you space them.
Cut a few extra pieces while you are preparing your supplies.
Why cut extras now?
Once glue is on the filling, you do not want to stop halfway through the lattice because you have run out of strips. Having a few spare pieces ready keeps the pattern moving smoothly.

Create the First Direction of the Lattice
4. Lay the First Strips Across the Filling
Place one of your colored filling circles on your work surface.
Arrange the first group of brown strips across the circle, keeping them parallel to one another.
Before gluing, check the spacing.
You want the strips to create a clear pattern without leaving extremely large gaps between some pieces and tiny gaps between others.
Once the arrangement looks right, glue the strips to the filling.
Use the amount of adhesive needed to secure the felt, but avoid flooding the surface with glue.
Important: Move your large brown crust bases away from your work area while doing this. Stray glue can land on them and leave unwanted marks.

5. Add the Strips in the Opposite Direction
Now take another group of brown strips and place them across the first group in the opposite direction.
This creates the familiar crisscross lattice appearance.
Do not rush this part.
Lay the strips down and check that they cross the first set consistently. If one strip sits noticeably differently from the others, correct it while the glue is still workable.
Once the placement looks good, secure the crossing strips with glue.
The aim is not to create a perfectly woven fabric. The strips simply need to overlap in two directions strongly enough to create the appearance of a pie lattice.

Let the Lattice Dry Before Trimming
6. Leave the Decorated Filling Flat While It Sets
This step is easy to skip, but it affects the final shape.
Allow the glue to dry completely before trimming the excess brown strips.
Why wait?
The strips are intentionally extending beyond the colored circle at this stage. If you trim or move them while the adhesive is still wet, they can shift and the lattice may lose its alignment.
Keeping everything flat while it dries helps the finished lattice stay in place.
If a strip moves while the glue is wet, gently reposition it and allow the piece to dry again before cutting.

Turn the Rough Lattice Into a Clean Pie Center
7. Flip the Filling Over
Once the glue is completely dry, turn the decorated filling piece over.
You should now be able to see the excess brown felt strips extending beyond the edge of the colored circle.
This is exactly what you want at this stage.
Do not try to make every strip perfectly sized before gluing. Leaving them slightly longer gives you room to create the final circular edge during trimming.
8. Trim Around the Circle
Carefully cut away the excess brown felt so the lattice follows the shape of the colored filling.
Work slowly around the curve rather than trying to remove a large amount of material in one cut.
Reader check: Keep the scissors following the edge of the colored circle. If you cut too far inward, you may remove part of the filling or shorten the lattice strips more than intended.
If a small section looks uneven, make a few careful corrective snips instead of repeatedly cutting around the entire circle.
The finished piece should now look like a colorful pie filling topped with a brown lattice.

Bring the Pie Together
9. Attach the Decorated Center to the Crust
Take one of your large brown crust circles.
Apply adhesive to the back of the decorated pie center, then position it in the middle of the brown circle.
Press it down firmly but gently.
Before the glue sets, check that there is a visible brown border around the filling.
Why does this matter?
That exposed border is what makes the piece read visually as a pie rather than simply a decorated felt circle.
If the filling is too close to one side, gently reposition it while the adhesive is still workable.
10. Shape the Outer Crust Edge
For a more pie-like finish, you can shape the outside edge of the brown crust.
Use your scissors to create a subtle wavy or scalloped edge around the outer circle.
This step is optional, but it adds a baked-pie character to the coaster.
Work in small sections and keep the scallops relatively consistent. There is no need to make every curve identical; the important thing is that the edge looks intentionally decorative rather than accidentally jagged.

If Something Goes Wrong
The Lattice Looks Crowded
If the strips are packed too closely together, the colorful filling may become difficult to see.
Next time: Leave slightly more space between the strips and check the arrangement before gluing.
The Strips Move While You Work
This usually happens when too much glue is used or when the piece is moved before the adhesive has set.
Fix: Stop moving the piece and allow it to dry flat. If a strip has shifted badly while the glue is still wet, reposition it carefully.
The Trimmed Edge Looks Uneven
Do not keep cutting away more felt just to make one small section match another.
Instead, make a few small corrective cuts around the affected area. Over-trimming can make the filling noticeably smaller.
Glue Gets Onto the Crust
Keep the large brown crust pieces away from the lattice work area until the decorated filling is finished.
If unwanted glue gets onto the crust, avoid spreading it further by rubbing the area.
Small Details That Make the Coaster Cleaner
- Use sharp scissors, especially with thicker felt.
- Cut several lattice strips before starting to glue.
- Keep the crust circles away while making the lattice.
- Let the lattice dry completely before trimming.
- Check the filling’s position before attaching it to the crust.
- Use enough adhesive to hold the felt without creating large visible glue spots.
These details do not change the basic craft, but they make the difference between a messy layered piece and a neat little felt pie.
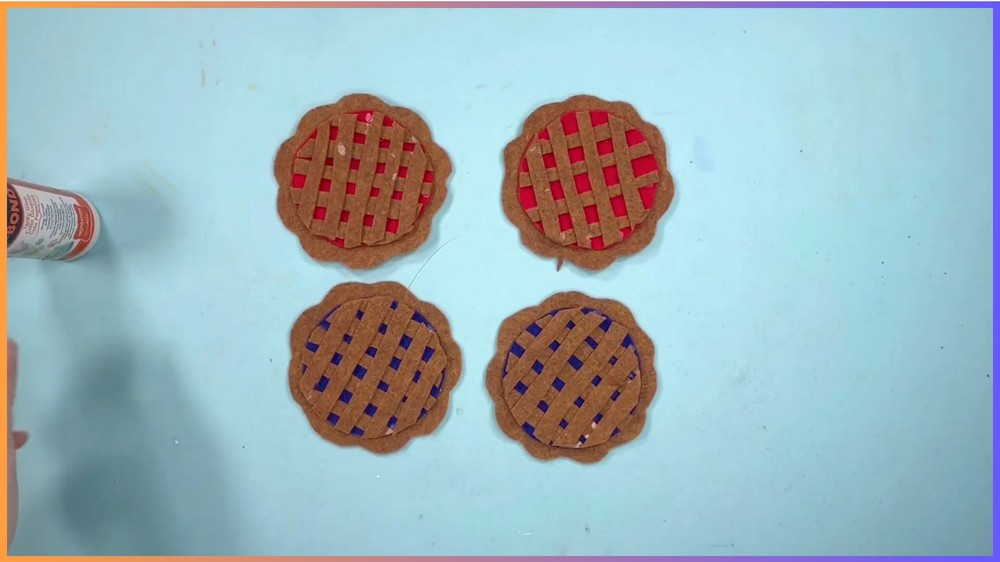
Change the Pie Flavor With Color
The colored filling is one of the easiest parts to customize.
- Red felt: A cherry-inspired pie look
- Deep purple felt: A blackberry or berry-inspired appearance
- Yellow or pale orange felt: A lighter pie variation
- Blue felt: A blueberry-inspired version
The brown crust and lattice can remain the same while the filling changes the personality of the coaster.
Add a Hand-Stitched Finish
If you prefer stitching to adhesive, you can replace some of the glued details with a simple running stitch using embroidery floss.
This gives the felt pie a different handmade texture.
For a stitched version, keep the basic circle-and-lattice arrangement the same and use stitching where you want the extra decorative detail.
Make a Set for Thanksgiving
One pie coaster is cute, but a small group can make a stronger seasonal table accent.
Make several coasters using the same brown crust while changing the filling colors.
You can also tie a finished set together with rustic twine to turn the coasters into a simple handmade host gift.
Before giving or using them, make sure all adhesive or stitching is secure and that no loose felt strips remain around the edges.
Note: If you face any hurdles in creating this project, then you can watch the tutorial here.
How to Use Your Felt Pie Coasters
Once the finished pieces are completely secure, place them beneath cups or glasses on your Thanksgiving or autumn table.
They can also add a seasonal touch to a coffee table or another casual drink setting.
Because the design resembles a miniature pie, the coaster works as both a practical table accessory and a playful piece of seasonal decoration.
Final Check Before Using Them
Take a moment to inspect each coaster:
- Is the lattice firmly attached?
- Are the trimmed edges clean?
- Is the colored filling centered on the crust?
- Is the outer crust edge secure?
- Are there any loose felt strips?
- Has the glue dried completely?
If you find a loose section, secure it before using the coaster rather than trying to fix it after placing a drink on top.
