
Looking for a fun, creative craft? This 3D origami chick is a perfect project! Made from tiny folded paper pieces, this adorable chick can brighten up your room or be a delightful DIY gift. Its cheerful look and simple charm make it great for decoration, a small toy, or even a conversation starter on your desk.
3D Origami Chick Tutorial
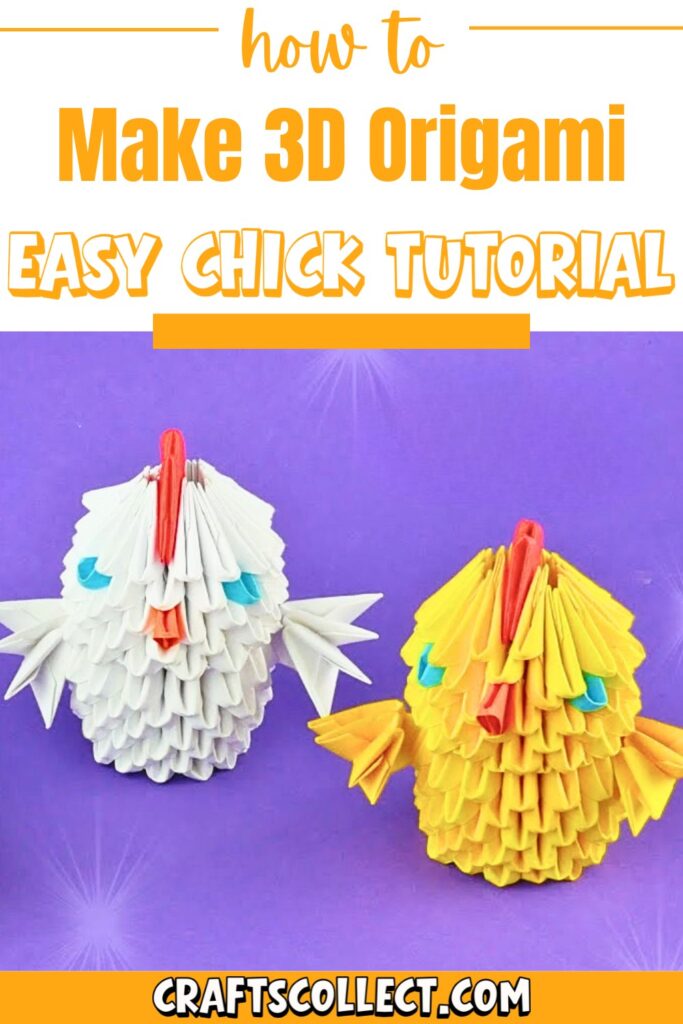
Creating this chick craft involves folding paper pieces and assembling them into layers step by step. You’ll need colorful papers (yellow, red, blue, and orange), and the process starts with learning how to fold basic pieces. Once you’ve got the hang of it, you can combine the pieces into rows to shape the chick’s body, neck, head, wings, beak, and even a cute red comb on top. It’s a relaxing and enjoyable activity, and the result is a lovely handmade creation that feels extra special.
Whether you’re crafting for fun or looking for a cozy weekend project, this 3D origami chick is ideal. Plus, making these little paper pieces can be a great way to unwind while watching TV or spending time with family. You can even glue the pieces together if you’d like the chick to last longer.
Credit Arthur 3D origami
Required Materials
To create a 3D origami chick in this tutorial, you’ll need the following:
- Colored paper:
- Yellow: 188 pieces
- Red: 2 pieces
- Blue: 2 pieces
- Orange: 1 piece
- Tools (optional but recommended):
- A cutting tool (scissors or paper cutter) to create small rectangles
- Glue (optional) to secure the finished model
Important Notes
- Practice Folding the Basic Origami Piece: If you are new to 3D origami, practice folding each basic triangular piece before starting the assembly process.
- Preparing Rectangles: Each small triangle is formed from small paper rectangles, and you will need to cut them uniformly. To form all the necessary shapes:
- A full sheet is folded in halves multiple times until the rectangles are obtained.
- Piece Orientation:
- Each triangular piece has a short side and long side.
- Pay attention to the orientation of the short side or long side depending on the tutorial’s instructions when assembling the chick.
- Time-Saving Tip: While folding pieces, you can watch TV or videos. Folding hundreds of pieces may seem repetitive, but prepping all pieces at once helps speed up assembly.

Step-by-Step Instructions
1. Making the Triangular Origami Pieces
- Take a sheet of paper and fold it in half, then cut it into two equal parts.
- Fold one of these halves in half again and cut it, creating smaller sections.
- Repeat this process until you create 16 small rectangles from one section of paper. Repeat to make a total of 32 pieces.
- Fold each rectangle into a triangular piece:
- Fold it in half horizontally to crease the center.
- Fold the top edges downward to align with the centerline.
- Flip the paper over, fold the bottom right corner inward, then do the same for the bottom left.
- Fold the strips upward, aligning them with the folded shape.
- Finally, fold the piece in half to create a triangle with two small pockets.

2. Preparing All Pieces
- Create 188 yellow pieces, 2 red pieces, 2 blue pieces, and 1 orange piece using the same folding process.
3. Assembly Instructions
Head and Body of the Chick
- Start with the first row:
- Use yellow pieces and place them short side up.
- Add another row (second row) by placing pieces long side outward.
- Continue adding rows following this sequence until you form a total of 3 rows, each with 14 pieces.
- Shape the body:
- Connect the first row into a ring by aligning and inserting the triangular pockets of adjacent pieces.
- Continue building up:
- Fourth row: Place the long sides outward and shape the assembly into a bowl-like form.
- Add rows for a total of 7 rows, maintaining 14 pieces per row.
- Create the neck:
- For the 8th row, switch back to placing pieces with the short sides outward. This narrows the ring slightly, forming the neck.

Head Assembly
4. Begin the head:
- Starting with yellow pieces, place 14 per row, starting with the long side outward.
- Make a total of 5 rows for the chick’s head.
- Insert 2 blue pieces for the eyes:
- Row 3: 1 blue, 3 yellow, 1 blue, and 9 yellow.
- Continue adding rows with yellow pieces afterward.
- Add the beak:
- Place the single orange piece into the third row of the head to form the chick’s beak. Hold adjacent pieces in rows 4–5 to keep the structure stable.
Wings and Comb
6. Assemble the wings:
- Take yellow pieces and insert them diagonally under the chick’s eyes.
- Use 4 yellow pieces for each wing, attaching them by connecting one pocket to the adjacent piece in the main body.

- Create the comb:
- Insert 2 red pieces into each other and attach the comb to the top of the chick’s head, opposite the beak.
Final Touches
- Review the model to ensure all pieces are snug and properly aligned.
- Optional: Use glue to stabilize the chick if you want a permanent structure.

