
A cheerful paper turkey takes shape with colorful feathers, simple paper pieces, and an easy arrangement tip for creating a balanced Thanksgiving tail.
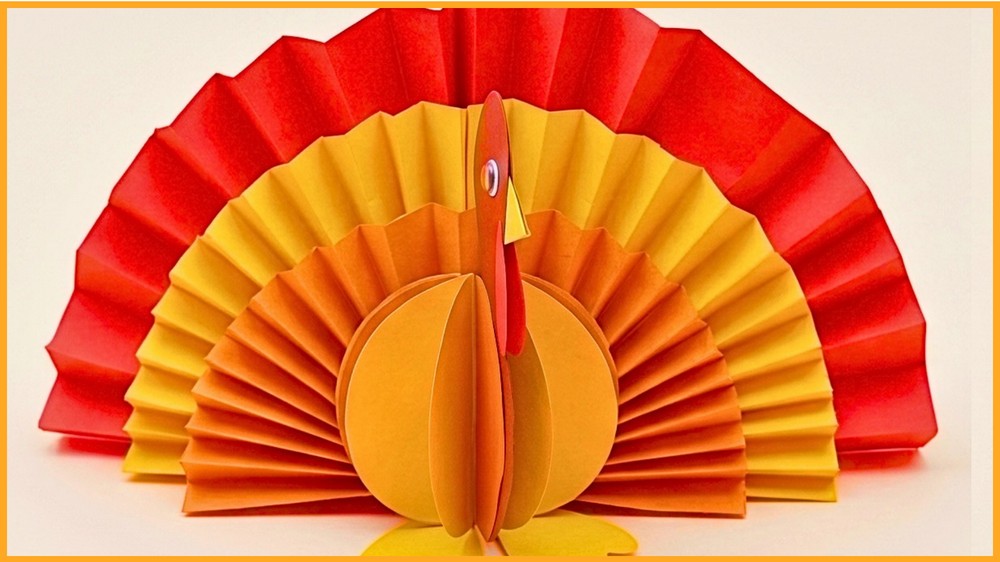
Thanksgiving crafts do not have to involve complicated materials or difficult techniques. This paper turkey comes together from simple paper shapes, but the layered feathers give it plenty of color and personality.
The part that makes the biggest visual difference is the tail. Instead of gluing the feathers down as soon as they are cut, you can arrange them first and see how the colors and spacing work together. That small step makes the final turkey much easier to balance.
Once the tail is ready, the rest of the craft becomes a matter of building the body and adding the smaller facial pieces. The head, beak, wattle, and eyes are what turn the paper shapes into a recognizable turkey.

You can keep the finished turkey in traditional Thanksgiving colors or change the papers to create your own version. The same basic idea can also become a gratitude activity by adding a thankful message to the individual feathers before they are attached.
What Makes the Turkey Look Like a Turkey?
Before cutting everything, it helps to understand the three parts that give this craft its character:
- The body provides the main shape.
- The feather fan creates the large, colorful tail.
- The face makes the finished piece recognizable as a turkey.
The feather fan is especially important because it sits behind the body and provides most of the color. If the feathers are too crowded, unevenly spaced, or hidden behind one another, the tail can lose its shape.
That is why the feathers are arranged before they are permanently attached.
Things that you need before crafting:
For this paper turkey, gather:
- Colored construction paper or craft paper
- Brown paper for the body
- Red, orange, and yellow paper for the feathers
- Small pieces of white and black paper for the eyes, or googly eyes
- Yellow or orange paper for the beak
- Red paper for the wattle
- Scissors
- Glue stick or liquid glue
- Pencil or marker
The source instructions do not require fixed paper dimensions, so the turkey can be made larger or smaller according to the look you want.
If you are making a small turkey, you will naturally need smaller facial pieces. If you make the body larger, scale the feathers and facial details accordingly so they do not look out of proportion.
How To Make:
Start With the Feather Fan
Rather than attaching pieces immediately, begin by preparing the part that will determine the turkey’s overall appearance: the tail.
1. Cut Several Feather Shapes
Choose several warm-colored papers and cut out multiple feather shapes.
Red, orange, and yellow create a traditional Thanksgiving look, but you can introduce other colors if you want something different.
The feathers do not need to be perfectly identical. What matters more is that they are similar enough in size to work together as one fan.
Why this matters:
The feathers will overlap and spread outward, so wildly different sizes can make the tail difficult to balance.
If one feather comes out noticeably larger than the others, do not worry. You can place it toward the back of the arrangement where it is less likely to dominate the tail.
2. Arrange the Feathers Before Using Glue
Lay all the cut feathers on your work surface.
Arrange them in a semi-circle or fan shape, allowing the lower portions to overlap.
Now step back and look at the arrangement as a whole.
Check three things:
- Are the feathers spreading evenly from the center?
- Are the colors distributed rather than concentrated on one side?
- Will enough of each feather remain visible after the body is placed in front?
This is the most useful point to make changes.
Do not glue yet. Once the feathers are attached, moving individual pieces becomes much more difficult.
If the Tail Looks Uneven
Move the feathers around instead of immediately cutting new ones.
A feather can be shifted slightly to fill an empty space, or a brighter color can be moved away from a crowded area.
If the tail still looks too narrow, spread the outer feathers farther apart. If it looks too crowded, reduce the overlap.
The goal is not mathematical symmetry. The goal is a tail that looks intentional and balanced.

Build the Turkey Body
Once the tail arrangement is working, prepare the main body.
3. Cut the Main Body Pieces
Cut out the turkey’s main body parts from your chosen paper.
The source allows for a base piece or folded paper structure that lets the turkey sit or stand flat, so choose the form that suits the finished display you have in mind.
Keep the body shape simple. It does not need intricate cutting to work with the colorful tail.
Why make the body after planning the tail?
The body will sit in front of the feathers. Knowing the size of the tail first helps you judge how much of the feather fan should remain visible.
4. Place the Body Against the Tail
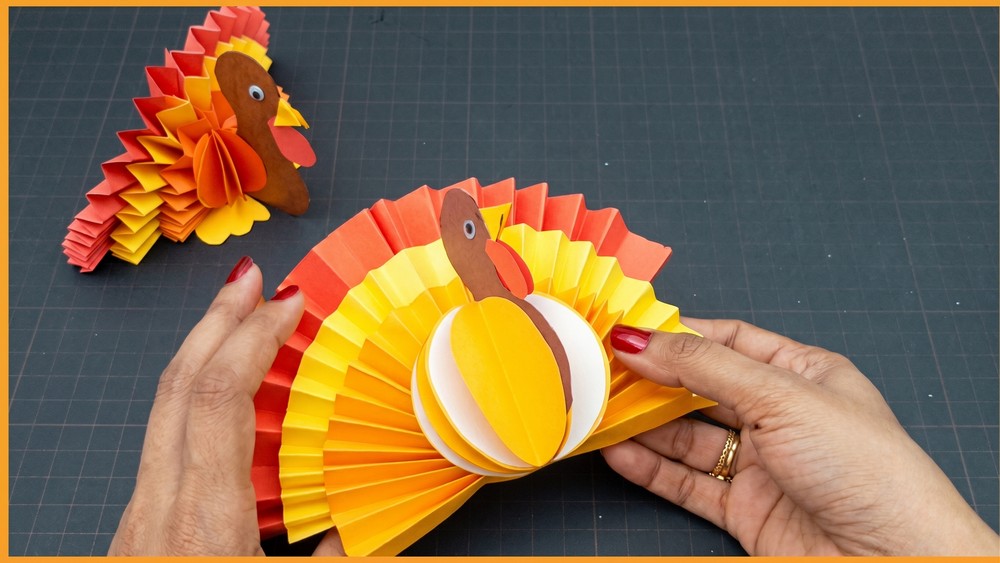
Before gluing, position the body in front of the feather fan.
Look at the turkey from the front.
Make sure the feathers are still visible around the body and that the tail extends clearly beyond both sides.
If too much of the tail disappears, adjust the feather placement before securing anything.
This is another useful dry-fit check: position the pieces without glue first, make your decision, and only then attach them.

Attach the Tail
5. Glue the Feather Fan to the Back
Once you are satisfied with the arrangement, glue the layered feather fan to the back of the main body.
Apply enough glue to secure the paper without soaking the pieces.
Press the pieces gently into place.
What happens next:
The body will cover the center and lower portion of the feather arrangement, leaving the colorful feathers visible around it to form the turkey’s tail.
Give the glue time to set before picking up or moving the turkey.
If the Feathers Shift While Gluing
Do not immediately pull the whole tail apart.
If the glue is still wet, gently reposition the affected feather and press it back into place.
If the glue has already dried, avoid repeatedly peeling the paper away because the paper can tear. Instead, work around the existing arrangement and reinforce a loose section with a small amount of glue.
Add the Head and Neck
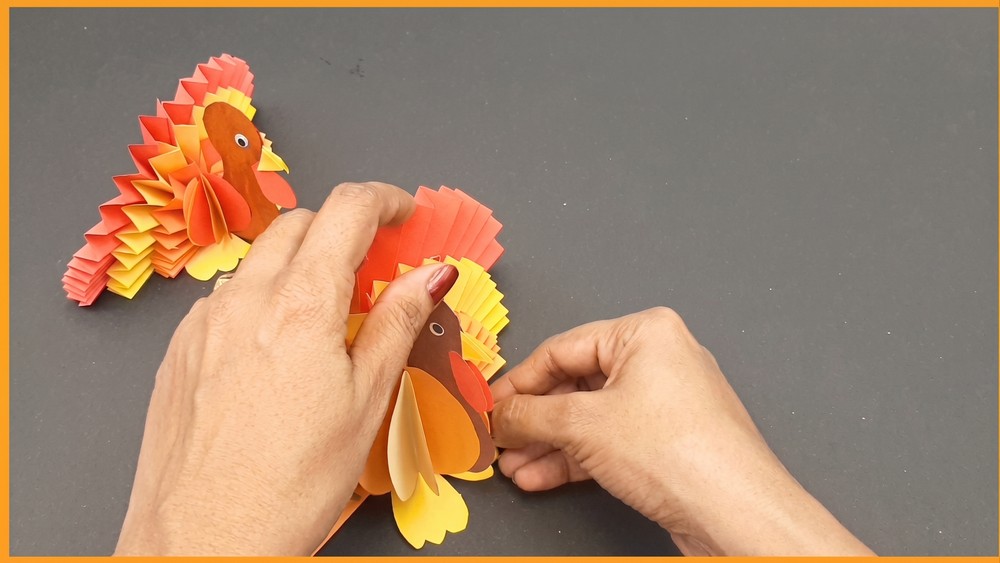
6. Attach the Head and Neck
Place the head and neck section at the front of the body.
Allow it to overlap slightly with the lower part of the feather arrangement.
This overlap helps the different paper pieces read as one turkey instead of several unrelated shapes.
Check the position before gluing.
Why check first?
Once the head is attached, it becomes harder to adjust the proportions of the face and body. A quick placement check prevents unnecessary repositioning later.
Press the piece down gently and let the adhesive set.
Give the Turkey Its Face
The smaller pieces come last because they are easier to position once the larger shapes are already secure.
7. Add the Beak
Cut a small yellow or orange beak.
Place it on the front of the face without glue first.
Check that it sits in the middle area where the eyes and wattle will make sense around it.
Once the position looks right, glue it down.
8. Attach the Wattle
Cut the small red wattle and place it beneath the beak.
The wattle is a small detail, but it helps make the face immediately recognizable.
Because it is lightweight and small, a little glue is enough.
9. Add the Eyes
Finish the face with eyes.
You can use:
- Small pieces of black and white paper
- Googly eyes
- Marker-drawn eyes
Position both eyes before gluing.
Reader check:
Look at the turkey from directly in front. If one eye is noticeably higher or farther from the center than the other, adjust it now rather than after the glue dries.
Add Any Final Details
10. Finish With a Marker
Once the main pieces are secure, use a pencil or marker for any additional facial or decorative details you want.
You can keep the turkey clean and simple, or add a few lines to give the face more definition.
Do not add unnecessary details just to fill empty space. The colorful tail and simple face are already enough to make the craft work.
Allow all glue to dry before moving the finished turkey.
Turn the Feathers Into a Thanksgiving Activity
One useful way to personalize this craft is to give the feathers a purpose before they become part of the tail.
Write one thing you are thankful for on each feather.
Do this before gluing the feathers together so you can write comfortably on each individual piece and make sure the messages remain visible.
Then arrange the completed feathers into the fan.
This changes the turkey from a simple decoration into a small Thanksgiving gratitude activity without changing the basic making process.
Paper Turkey Ideas for Different Looks
Traditional Thanksgiving Turkey
Use brown for the body with red, orange, and yellow feathers. This gives the craft a familiar autumn appearance.
Patterned Paper Turkey
Replace some of the plain paper with patterned scrapbook paper.
If the patterns are bold, keep the facial pieces simple so the turkey does not become visually crowded.
Colorful Modern Turkey
There is no requirement to stay with traditional Thanksgiving shades. Pastel, bright, or unexpected color combinations can give the same paper turkey a completely different personality.
Textured Turkey
For extra tactile interest, combine paper with small pieces of felt or corrugated cardboard.
Use heavier materials selectively. If an embellishment becomes too heavy, it can make the paper pieces harder to keep securely attached.
Use the Finished Turkey
After the glue has dried completely, place the turkey wherever you want to add a Thanksgiving touch.
It can work as a simple seasonal decoration, a classroom craft display, or part of a Thanksgiving table setting when made at an appropriate size.
If you make several turkeys, vary the feather colors, eye styles, or facial details so that each one looks slightly different.

Note: If you face any hurdles in creating this project, then you can watch the tutorial here.
A Quick Final Check
Before displaying the finished turkey, look over the areas most likely to need attention:
- Is the feather fan securely attached?
- Are the feathers still arranged clearly behind the body?
- Is the head firmly attached?
- Are the beak, wattle, and eyes secure?
- Has the glue dried completely?
- Can the turkey sit or stand as intended?
If a small piece is loose, fix it with a little adhesive and allow it to dry again before moving the turkey.

[…] A cupcake liner can become much more than something used for baking. Folded in half, its natural pleats create a ready-made feather fan for a cheerful Thanksgiving turkey. […]