Crafting is an amazing way to add a personal touch to everyday items, and this DIY Fall Gnome Shaker Keychain project is no exception. This fun and simple craft offers endless creative possibilities, allowing you to customize your keychain with festive fall vibes. The materials are easy to work with, making it perfect for beginners and experts alike, and the finished result is not only adorable but also highly functional.

DIY Fall Gnome Shaker Keychain
This project centers around creating a fall-themed gnome keychain with a charming shaker detail that sets it apart. The shaker element adds a playful, interactive twist, making it a unique accessory or gift. Use it to add a warm seasonal accent to your keys, bags, or even as a cheerful decoration. Its versatility and handcrafted charm make it an enjoyable project with practical benefits you’ll love to show off.
Credit SophiaTheHobbitCrafter
Features & Benefits
- Fun Seasonal Theme: Fall colors and gnome design bring autumn charm.
- Interactive Shaker Detail: Adds movement and personality for a unique look.
- Versatile Use: Works as a keychain, bag charm, or personalized gift.
- Beginner-Friendly: Simple steps make this craft enjoyable for all skill levels.
Materials Required
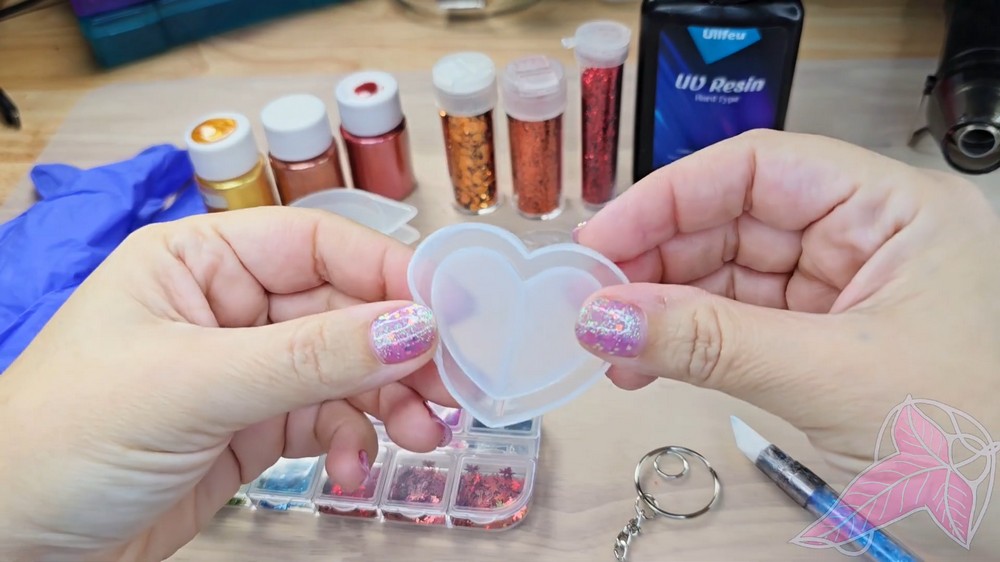
- Shaker Mold (heart-shaped preferred for this project).
- UV Resin (or epoxy resin for a stronger finish).
- Mica Powder (gold, fall reddish, and other autumn shades).
- Glitter (fine and chunky – leaves, green, purple, light gold).
- Thin clear plastic suitable for covering shaker molds.
- Sticker (fall-themed, printed with UV or waterproof material).
- Nail molds (for decorative shaker inserts).
- Saline or baby/mineral oil (optional for filling shaker).
- Cups (for mixing resin and mica powder).
- Heat gun or UV light box (to cure resin).
- Dremel tool or push drill.
- Hardware for keychains (loops, connectors, tools like tweezers).
- Alcohol wipes (for cleanup).
- Gloves (to keep hands protected).

Important Notes
- Resin Safety: UV resin is better for thin layers, ideally under 3mm. Epoxy resin works better for larger projects but takes longer to cure.
- Plastic Selection: Thicker plastic is preferred for durability; thinner materials may warp from heat.
- Glitter Consideration: Larger glitter chunks may cause uneven curing and bumps. Fine glitter mixes better.
- Liquid Filler: Saline, baby oil, or mineral oil can be used for the shaker effect. Note that oil mixes might need better sealing as resin and oil don’t bond well.
- Heat Management: UV resin generates heat during curing, which can warp thin plastic layers.
- Sticker Design: Transparent stickers work well, but adding clear resin on top can prevent snagging during use.
Step-by-Step Instructions
Part 1: Preparing the Plastic Cover
- Trace the Mold Outline:
- Use a Sharpie to carefully trace the outline of the shaker mold onto a piece of clear plastic.
- Cut out the plastic piece, ensuring it fits snugly without extending far beyond the mold’s edges.
- Plastic Selection Tip:
- Thicker clear plastic is preferred to prevent warping during the heat curing process.
Part 2: Mixing Resin and Designing Colors
- Prepare Resin Mixture:
- Mix UV resin with gold mica powder and fall-inspired glitter in small cups, adjusting amounts to your preference. Stir thoroughly.
- If using UV resin, keep layers under 3mm thick to ensure proper curing.
- Pour Resin Into Mold:
- Slowly pour the resin mixture into the shaker mold, aiming for artistic effects by alternating between colors (gold, reddish hues, etc.).
- Use heat (heat gun or UV light) to remove bubbles from the resin. Ensure the mold is completely filled.
- Cure the Resin:
- Place the mold under a UV light or in a UV light box to cure.
- If glitter prevents resin from curing evenly, consider adding a thin layer of clear resin on top.

Part 3: Adding Shaker Inserts
- Create Decorative Inserts:
- Fill nail molds with leftover resin mixtures in leaf shapes (green, red, purple, gold). Cure them with UV light.
- Demold and inspect each piece for clarity and design consistency.
- Add Inserts to Shaker:
- Position the resin leaves inside the shaker mold as decorative elements.

Part 4: Sealing the Shaker
- Attach the Plastic Cover:
- Add a thin line of UV resin around the edge of the shaker mold.
- Carefully press the clear plastic cover onto the resin seal, ensuring it adheres firmly without any gaps or overhang.
- Top Layer and Curing:
- Apply another thin layer of resin on top of the mold to ensure the plastic is secured. Cure the resin using UV light.
- Note: Thinner plastic may warp slightly, creating bumps. This can be minimized but is not always avoidable.

Part 5: Adding Liquid Filler
- Fill the Shaker:
- Use a syringe with an 18-gauge needle to fill the shaker with saline, baby oil, or mineral oil.
- Fill carefully to avoid overflows while maintaining enough liquid for a proper “shaking” effect.
- Seal the Filling Hole:
- Dry the hole and surrounding areas with a towel. Apply a small drop of resin to seal the hole, cure, and inspect for leaks.
Part 6: Keychain Assembly
- Drill Hole for Hardware:
- Using a Dremel tool, slowly drill a hole into the top of the cured shaker mold. Ensure you don’t drill through the sealed area.
- Attach Keychain Loop:
- Dip the loop hardware into resin for extra adhesion. Twist it into the drilled hole carefully using tweezers.
- Cure the loop/resin area to secure it.
- Attach Keyring:
- Use jewelry tools (connectors, pliers, tweezers) to connect the loop to the keychain ring.

Part 7: Final Touches
- Inspect and Test:
- Shake the keychain to ensure smooth movement of the glitter and inserts.
- Check for any leaks or issues with the resin seal.
- Enjoy Your Creation:
- Admire your fall-inspired gnome shaker keychain, complete with autumn colors, leaves, and glitter.
