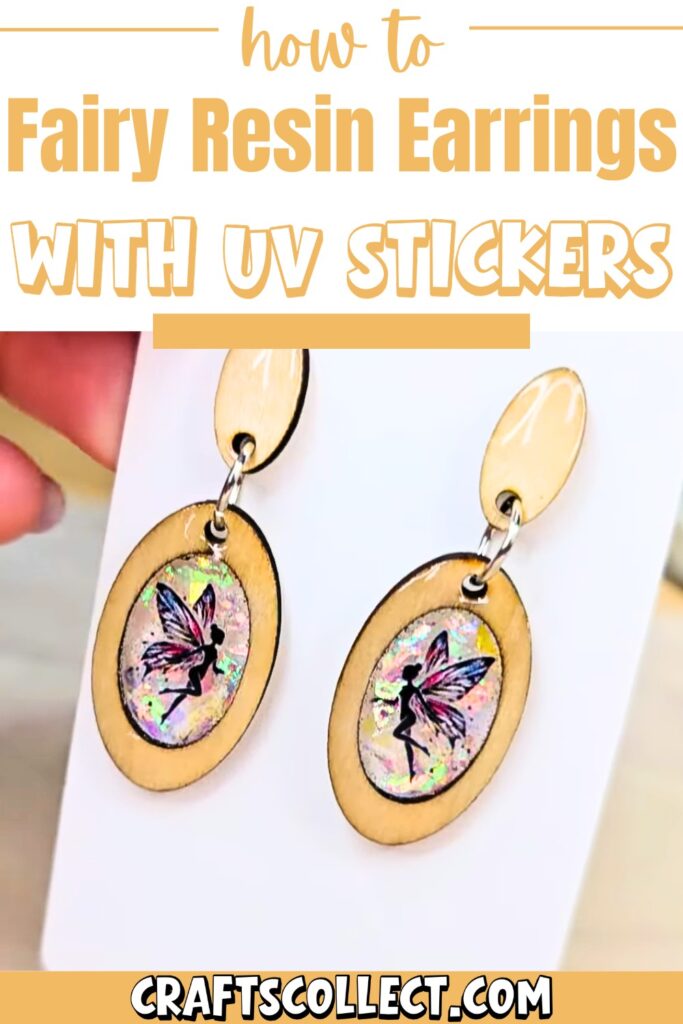
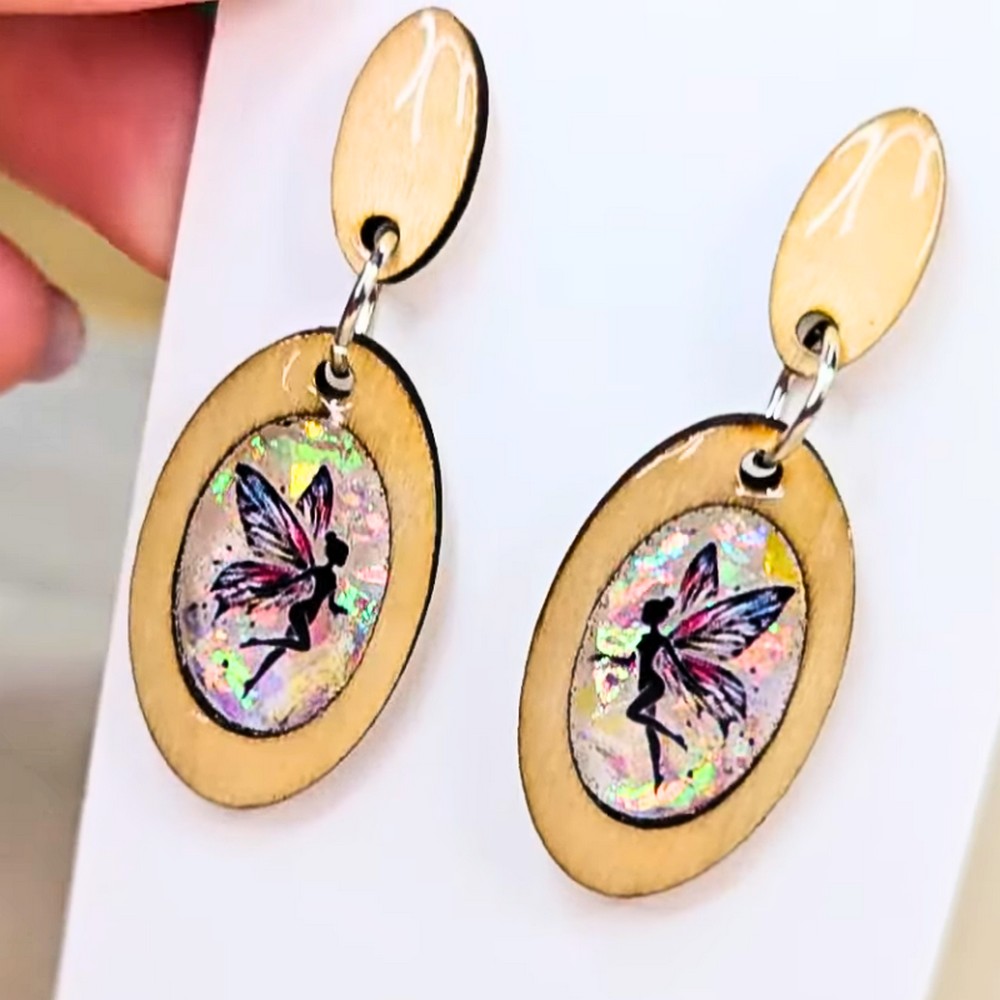
Fairy resin earrings are tiny works of art you can wear. These magical earrings feature sweet little fairy designs floating inside sparkling resin and a smooth wooden base. They’re lightweight, enchanting, and can match outfits for any occasion, from casual to special celebrations. Perfect for gifting or accessorizing, these earrings bring a fun, creative touch to your day.
DIY Fairy Resin Earrings with UV DTF Stickers
You don’t need fancy tools to enjoy this creative activity. It’s a fun way to make something unique that you can wear every day or on special occasions. Try choosing different stickers like fairies, flowers, or abstract designs to make each set personal and exciting. These earrings also let you express your creative side in a beautiful way.
Credit SophiaTheHobbitCrafter
Required Materials:
- Fairy Stickers – Nail art stickers (typically available on Amazon or similar platforms).
- Iridescent Flakes – Pre-cut or self-made.
- Wooden Bezels – Handcrafted (e.g., made with a laser cutter).
- UV Resin – For the earring mold and final coating.
- Resin Tape – To secure the mold and minimize resin leakage.
- Silicone Cup – For mixing resin.
- Silicone Tools – To help spread and manipulate resin.
- UV Lamp/Dryer – For curing the resin.
- Jump Rings and Earring Hardware – For the finishing touches.
- Sanding Tools – To remove burn marks from wooden bezels.
Important Notes:
- Use resin tape effectively to prevent leakage. After sticking the wooden bezel to the resin tape, push it down from behind to ensure a tight seal.
- Warm the resin slightly before application to remove air bubbles and improve flow.
- When choosing stickers, purchase designs in sets of 2+ or ensure flip-design nail stickers are available for symmetrical earrings.
- Be careful not to cover the holes in the bezels with resin to make post-assembly easier while maintaining design clarity.
Detailed Step-by-Step Instructions:
Step 1: Preparing the Wooden Bezels
- Sand the wooden bezels to remove any burn marks or imperfections. This step ensures a smooth, clean surface for the resin to adhere to.
- Stick the bezels onto resin tape. To prevent resin leakage, press down firmly on the tape from the backside of the bezel.
Step 2: Mixing the Iridescent Resin
- Add UV resin and iridescent flakes into a silicone cup. Mix them together thoroughly.
- Warm the resin slightly (optional but recommended) to remove any trapped air bubbles and improve the clarity of the final piece.
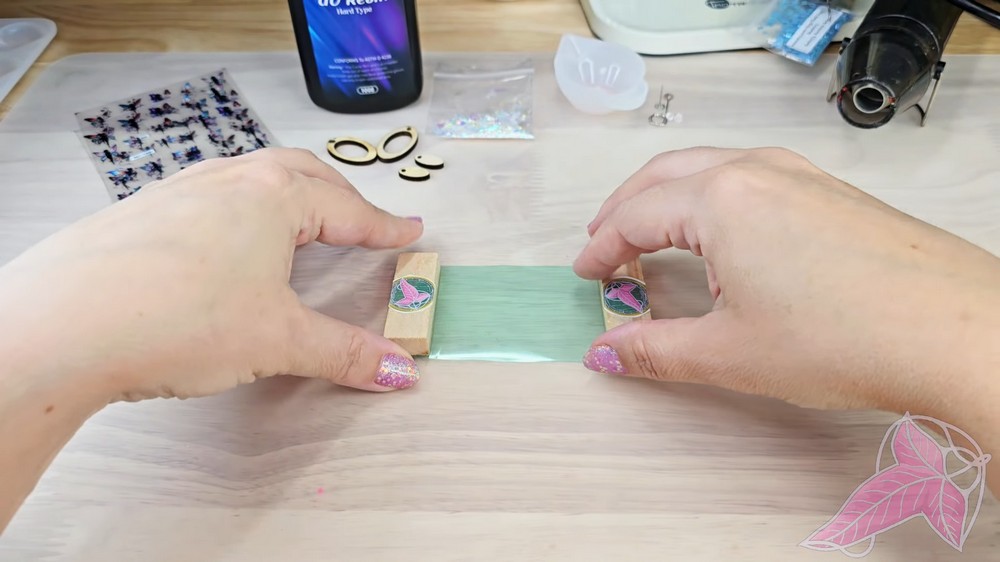
Step 3: Filling the Bezels
- Pour the mixed resin into the wooden bezels. Use a silicone tool to push and evenly distribute the resin inside the mold.
- Ensure the surface is as flat and level as possible. Since a sticker will be applied later, avoid uneven resin surfaces.
- Warm and lightly heat the resin again with the UV dryer or heat tool to remove additional air bubbles.
- Cure the resin under a UV Lamp until fully hardened.
Step 4: Adding the Stickers
- Select your desired fairy sticker. Ensure the size and design align with the bezels for a perfect fit.
- Pro Tip: When using nail art stickers, flip-design patterns on a single sheet or multiple sheets ensure symmetry for earrings.
- Stick the sticker onto the flat resin surface after it has cured. Apply gently to avoid wrinkles.

Step 5: Coating Over the Sticker
- Apply a thin layer of UV resin over the sticker. This layer seals the design in place and adds a glossy finish.
- Spread the resin carefully using silicone tools, ensuring it doesn’t seep into the earring post holes.
- Cure this layer of resin under the UV lamp until hardened.
Step 6: Strengthening the Back and Adding Posts
- Flip the earring bezel over and coat the back with another thin layer of resin. Let the wood grain remain visible for aesthetic appeal.
- Attach the earring post by applying resin to the post’s attachment point. Press the post into place and cure with UV light.
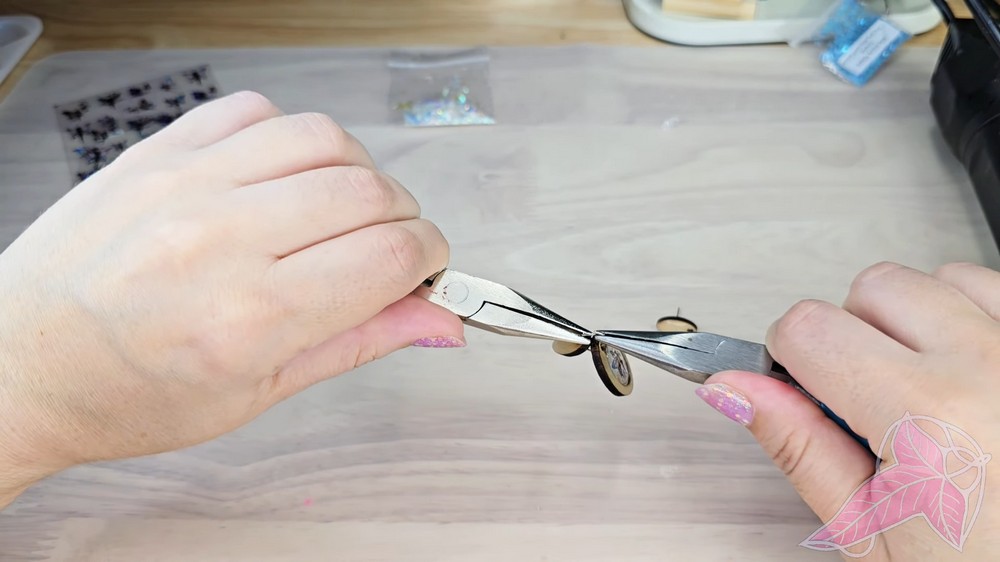
Step 7: Attaching the Hardware
- Use jump rings and any necessary hardware for assembling the earring hooks.
- Open the jump ring, attach the bezel to the earring hook, and close the ring securely.
- While there are advanced methods for attaching jump rings, this basic method works well for most DIY purposes.
Step 8: Final Checks and Display
- Inspect the earrings for flaws like bubbles or uneven surfaces. Small imperfections may blend in with the glitter and overall design.
- Mount the finished earrings on an earring card for presentation or gifting.