
A bunny balloon animal is a charming and fun creation that brings smiles to both kids and adults. Whether you use it as a playful decor piece for parties or as a delightful toy for little ones, this adorable bunny is sure to brighten up any moment. It’s simple to make, yet has an impressive design, making it a standout among balloon animals.
Bunny Rabbit Balloon Animal Tutorial

To bring your bunny to life, all you need is a carefully inflated balloon and a few basic twists. The process involves crafting the bunny’s head, ears, body, and tail step by step. You can adjust the size of the ears or the body to customize the look, and the pinch twist technique helps secure the shape for durability. With scissors, you can trim the balloon to finish off the design neatly. The end result is an ultra-cute, cheerful bunny that can be enjoyed as a toy or displayed as decoration.
Credit AboutMagic
Required Materials
- One long twisting balloon (e.g., 260Q balloon)
- Balloon pump (to inflate the balloon)
- Scissors (optional, for trimming the excess balloon)
Important Notes
- Before inflating, leave about 5 to 6 inches uninflated at the end of the balloon to ensure you have space to form twists.
- The tutorial uses an extra-long nozzle (created during inflation) to help secure parts of the bunny.
- Be gentle while twisting to prevent popping. Avoid overinflating.
- Practice creating basic twists and lock twists beforehand, as these are fundamental techniques for making balloon animals.

Step-by-Step Instructions
1. Inflate the Balloon
- Inflate the balloon, leaving 5 to 6 inches uninflated at the end.
- For this design, you’ll need an extra-long nozzle:
- Hold the nozzle in your right hand.
- Using your left hand, squeeze the balloon gently near the nozzle to create slack while preventing air from escaping.
- Release your right hand slowly to pull more nozzle length.
- Repeat the process until satisfied with the length of the nozzle.
- Tie off the balloon securely at the nozzle.

2. Create the Bunny’s Nose
- Make the first small basic twist (approximately 2 inches) near the nozzle.
- Make a second small basic twist of the same size (2 inches).
- Twist the two basic twists together and secure them to the nozzle (lock twist).
- Feed the nozzle through the two basic twists to prevent it from coming undone.
- From here, you should have the bunny’s nose secured.
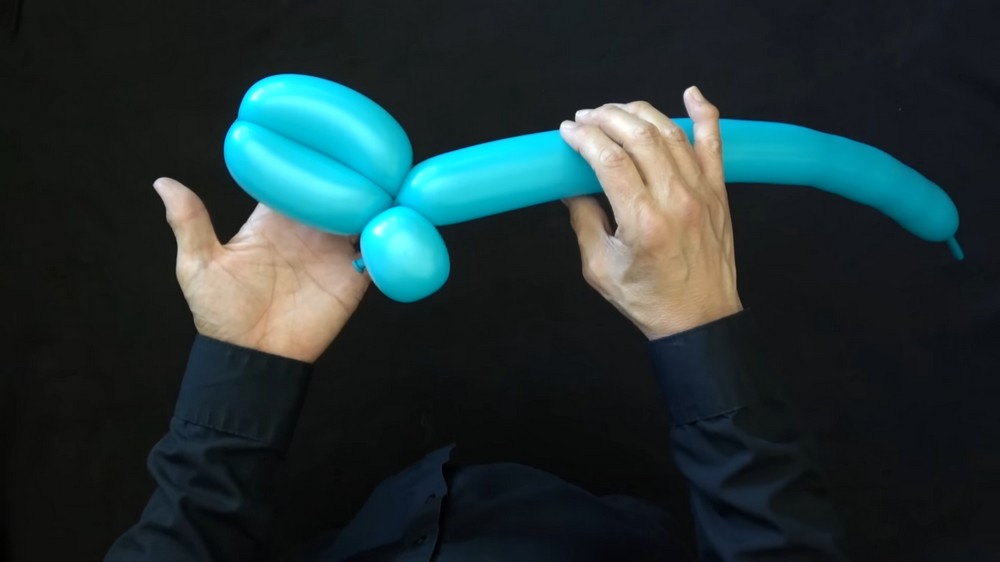
3. Create the Bunny’s Ears
- Form the first bunny ear:
- Make a longer twist (about 3 to 4 inches) for the bunny’s ear.
- Form the second bunny ear to match the first:
- Create another 3 to 4-inch twist.
- Twist the two ears together at their base in a lock twist.
- You should now have a bunny head shape with the nose and ears.
4. Straighten the Head
- To position the head properly, you need an uninflated section of the balloon below the head:
- Gently squeeze the balloon and push the air down to create an uninflated section below the head.
- Hold the uninflated section and give it a twist to secure it.
- Attach the bunny’s ears and nose securely in place using the extra-long nozzle:
- Wrap the nozzle around the base of the ears and then tuck the excess nozzle into the bunny’s head to secure it neatly.

5. Create the Body and Legs
- Start forming the bunny’s body and legs:
- Create four small basic twists (each about 1-2 inches) for the front and back legs.
- Attach the four twists together in a lock twist, securing them at the base of the head.
6. Create the Bunny’s Body and Tail
- Form the body:
- Make a small twist (about 1.5 inches) right below the legs.
- Form the tail:
- Create a pinch twist at the end of the body for the tail.
- Detach or trim off any excess balloon:
- Option 1: If there is an uninflated section at the end, pinch it off, trim it, and wrap it around the base of the pinch twist (tail).
- Option 2: If the balloon is fully inflated:
- Squeeze the end of the balloon to create slack, then trim and deflate the excess.
- Secure the remaining end by wrapping it around the tail.

7. Secure the Balloon
- Reinforce the bunny’s body and tail:
- Wrap the pinch twist (tail) securely between the bunny’s arms and legs to hold everything tightly in place.
- Adjust the balloon as needed to ensure the bunny looks cute and balanced.
Final Result
Your balloon should now resemble a cute bunny with long ears, a small body, and a fluffy tail! If necessary, make minor adjustments to the twists and positioning for the best appearance.

