
This Halloween bucket isn’t just a simple container—it’s a creative masterpiece! Designed as an adorable owl, it is perfect for trick-or-treating, decorating your home, or giving as a gift. Its fun design and Halloween-inspired colors make it a standout addition to your spooky celebrations.
Let’s Make a Halloween Bucket
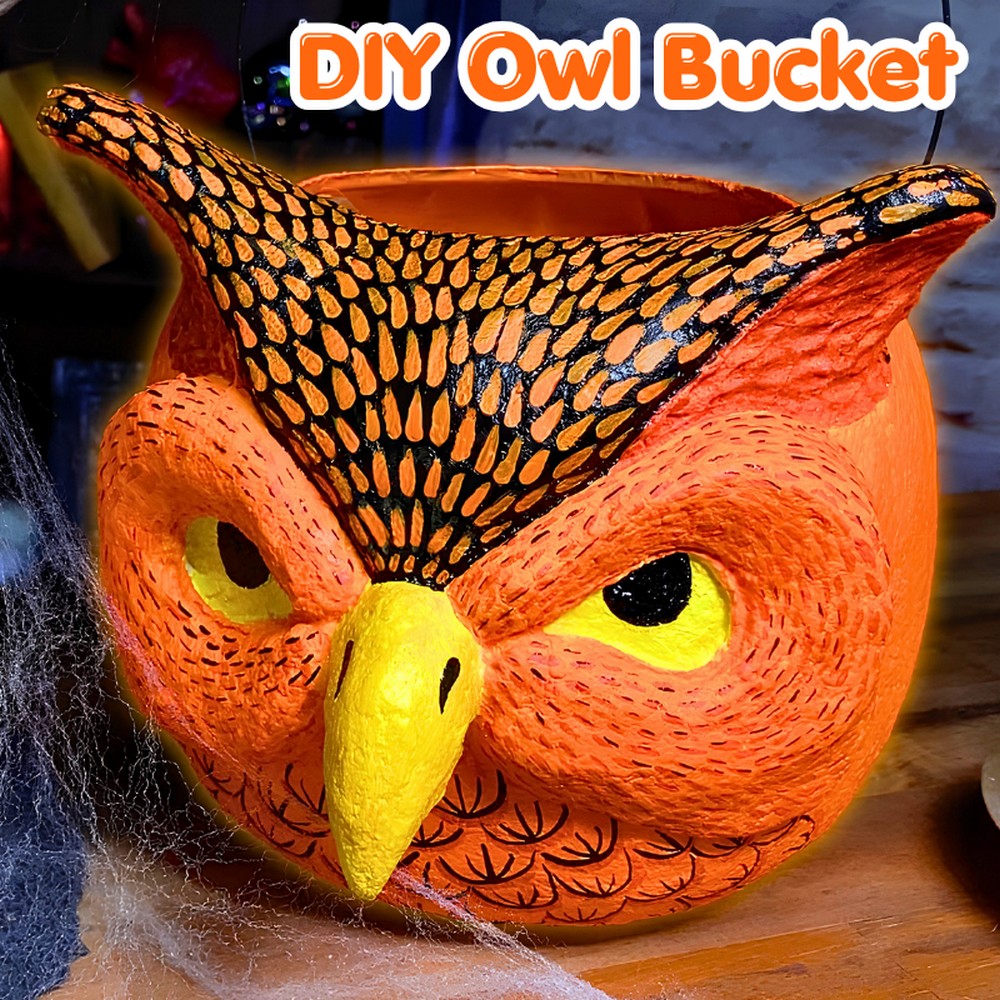
To make this bucket, start with a classic plastic pumpkin bucket as your base. Add a layer of sculpted tin foil to create the owl shape, secured with masking tape. The magic happens with instant papier-mâché clay—easy to use and mess-free by just adding water. Anyone can join in this creative craft!
Credit Mythical Makers Workshop
Once the clay is applied and dried, sanding smooths out any bumps for a polished finish. Then, paint your owl bucket with Halloween colors like orange, black, and white. Customize it with fun patterns or keep it simple—it’s all about putting your special touch on the design!
This DIY Halloween bucket is both practical and fun. Use it for collecting candy, display it as décor, or even turn it into a festive centerpiece. Making it is easy, and when you’re done, you’ll have a personal and artistic bucket perfect for the spooky season.
Required Materials
- Plastic Pumpkin Bucket: This acts as the base or foundation for the project.
- Tin Foil: Used to sculpt the raised shapes and form the skeleton of the owl.
- Masking Tape: Helps to secure the tin foil and creates a smooth base for the papier-mâché to stick.
- CelluClay Instant Papier-Mâché: A lightweight and versatile sculpting material applied over the taped surface.
- Water: Essential for activating the papier-mâché.
- Sculpting Tools: Use items such as butter knives, silicone spatulas, or even your hands to work with and shape the papier-mâché.
- 80-Grit Sandpaper: Used for smoothing the dried surface of the papier-mâché to ensure the finished bucket is neat and ready for painting.
- Gesso: A surface primer to make paint adhere better and enhance color vibrancy.
- Acrylic Paint: Choose a palette of Halloween-themed colors for the final decoration.

Important Notes
- This project involves turning an ordinary plastic pumpkin trick-or-treat bucket into a festive owl-themed decoration using papier-mâché techniques.
- Ensure the design is drawn onto the plastic bucket before starting to avoid confusion about placement during the sculpting process.
- Drying times can vary depending on the thickness of the papier-mâché layers, but the project in the tutorial dried completely in approximately 8 hours with a fan.
- Keep water on hand throughout the process to moisten your hands and tools, reducing the messiness of working with clay.
- Sanding is an essential step and should not be skipped if you’re aiming for a polished and professional finished product.
- Priming with gesso enhances the durability and brightness of your paint. Skipping this step may cause the paint to appear dull or uneven.
Step 1: Preparing the Bucket
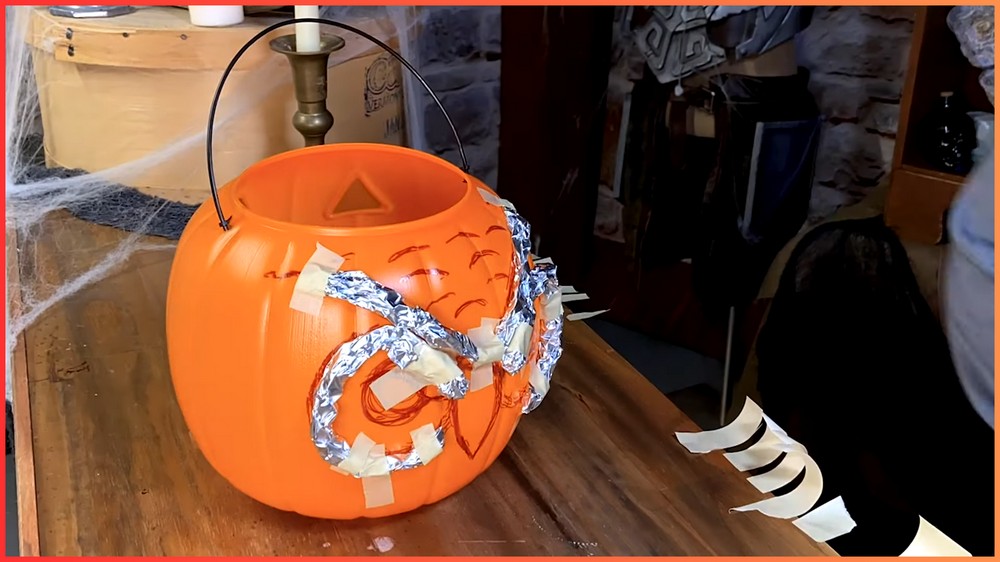
Begin with a classic plastic pumpkin bucket, which serves as the base for the project. Before diving into the sculpting, use a marker to draw the outline of an owl directly onto the bucket. This drawn design guides you as you layer and sculpt the details, ensuring that the finished product resembles the intended theme.

Step 2: Forming the Skeleton with Tin Foil
Next, take strips of tin foil and roll them into long “snakes.” Each piece will act as the foundation for building out the three-dimensional parts of the owl, such as the wings, eyes, ears, and any other raised or sculpted details. Position these foil “snakes” onto the bucket according to your drawn guide.
Once in place, press them down gently to contour them to the bucket’s shape. Use masking tape to secure the foil pieces onto the bucket, ensuring they are firmly attached before proceeding to the next step. The tape also helps smooth out any ridges or irregularities in the foil.
Step 3: Covering with Masking Tape
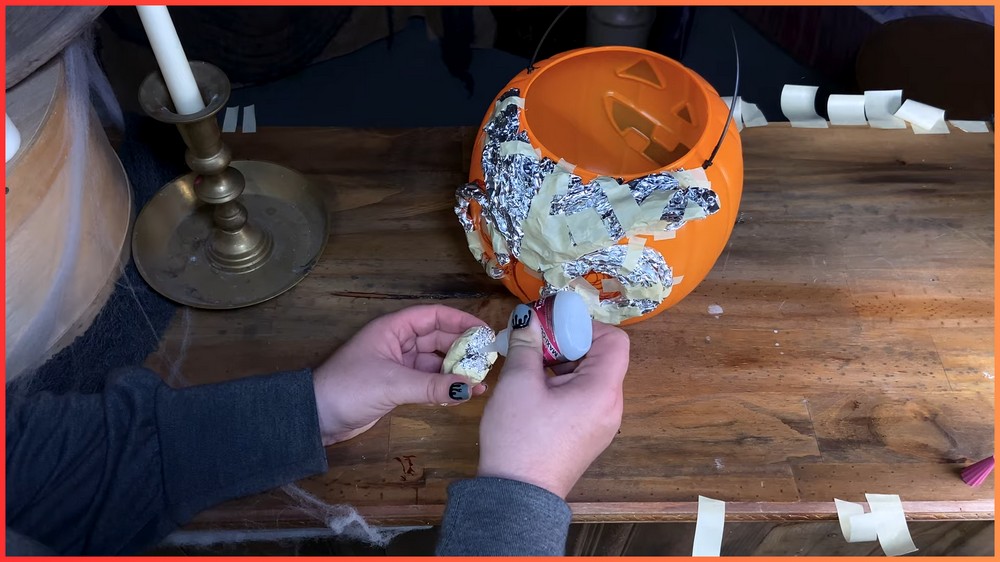
Cover the entire bucket with at least one complete layer of masking tape. Go over the tin foil as well as the exposed plastic areas, which prepares the surface for the papier-mâché application. This step also helps create a uniform surface. Work carefully to smooth out bumps and creases as much as possible since this layer affects how well the papier-mâché adheres.
Step 4: Mixing and Applying Papier-Mâché
Prepare the CelluClay papier-mâché by following the instructions on the package. Pour some of the dry CelluClay into a bowl and gradually add water while mixing until it reaches a dough-like consistency—smooth but not overly wet. If the mixture feels too wet or sticky, you can balance it by adding more dry CelluClay.

Start applying the prepared papier-mâché over the masked bucket using sculpting tools or your hands. Begin with a thin layer, covering the bucket evenly. Shape the material over the foil skeleton to add depth and texture.
For fine details, like feathers or facial features, use your fingers or smaller sculpting tools to refine the shapes. Dipping your hands or tools in water will help keep the clay workable and prevent sticking.

Step 5: Drying the Papier-Mâché
Once you’ve shaped the entire owl design, set the bucket aside to dry. Place it in a well-ventilated area with a fan for quicker drying. The drying process typically takes 8 hours, but it might take longer depending on the thickness of the applied layers. Make sure the papier-mâché is completely dry before moving on to the next step to avoid potential cracks or structural issues.

Step 6: Sanding the Surface
After the papier-mâché has fully dried, the surface may feel rough or uneven. Use 80-grit sandpaper to smooth out bumps, creases, or sharp edges. Sand gently, focusing on areas that will be most visible. This step ensures that the final product has a polished and professional appearance. Be patient during this process—sanding is vital for achieving the best results.

Note: If you face any hurdles in creating this project, then you can watch the tutorial here.
Step 7: Priming with Gesso
Once the surface has been smoothed, apply at least two coats of gesso to the entire bucket. This step primes the papier-mâché for painting by creating a neutral, sealed surface. Gesso also enhances the vibrancy of acrylic paint, especially when using light or bright colors. Allow each coat of gesso to dry completely before applying the next.

Step 8: Painting the Bucket
Now comes the fun part: painting your Halloween bucket! Use acrylic paints in traditional Halloween colors such as orange, black, white, and even a touch of gold or silver for accents. Start by painting the base colors first, covering large sections of the owl design.
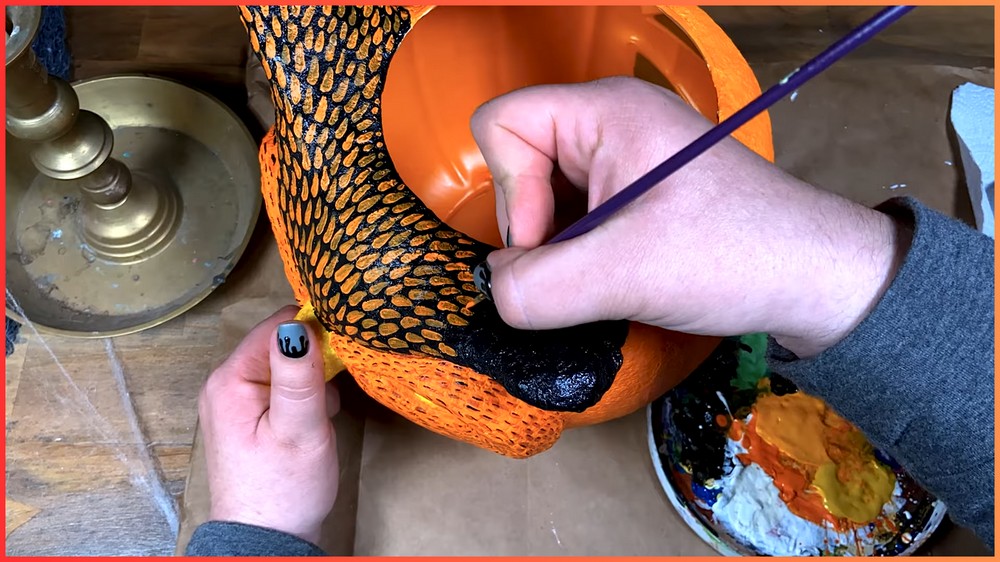
Once the base is dry, add details such as feathers, eyes, and other intricate patterns. Feel free to customize the design to suit your personal style!

