
Pumpkin-themed paper decorations are a fun and creative way to celebrate Halloween. These cheerful and charming designs can brighten up your space, making them perfect for wall decor, party decorations, or even gifts. With just orange paper, scissors, and a pencil, the magic begins!

Easy Halloween Decorations
Creating these pumpkin designs is simple and enjoyable for kids and adults alike. Start by folding the paper step-by-step, drawing stacking pumpkins with different sizes, and topping them off with a cute little hat. Once cut and unfolded, the art reveals a pattern that’s perfect for adding festive vibes to any room.
credit Helpful Arts & Craft
These decorations are a fantastic way to bring color and Halloween cheer into your home. Hang them on walls, windows, or doors, or use them to add a handmade touch to your Halloween party decor. The process is so easy that even kids can join in the fun, making it a great bonding activity.
Let your creativity shine while making these. Whether you keep your pumpkins simple or add fun details like faces or spooky expressions, the result is always joyful. Grab your orange paper, gather your family or friends, and enjoy making these delightful Halloween decorations together!
Required Materials:
- Orange rectangular sheet of paper – You can use construction paper, origami paper, or any medium-thickness paper for durability. Orange is the traditional color associated with Halloween!
- Sharp scissors – Precision is key when cutting out the details of the pumpkins and hats.
- Pencil – To sketch the outline of your design before cutting, ensuring accuracy.
- Smooth working surface – A clean, flat area to work on will help you fold and cut the paper neatly.
- Optional extras – Markers, glitter, and stickers (if you want to decorate your finished pumpkins later).
Important Notes:
- The size of the paper determines the overall size of the decoration. Starting with a larger sheet will give you bigger pumpkins, while a smaller sheet will result in a miniature version.
- Always ensure that your folds are precise and even—they directly impact the finished look and structure.
- Be cautious when using scissors, especially if children are involved in this craft. Supervision is recommended.
- Unfold the paper gently after cutting to avoid tearing.
How to Make Pumpkins with Hats
Creating funny pumpkins with hats from orange paper is a fun and festive Halloween craft suitable for kids and adults alike. Here’s how to do it:
Step 1: Prepare Your Paper
Choose a rectangular sheet of orange paper, as the rectangular shape is ideal for folding and stacking pumpkin designs. Place the paper horizontally on a flat, clean surface with the short side facing you. Set aside your scissors and pencil for now, as you’ll first focus on the folding process.

Step 2: Start Folding
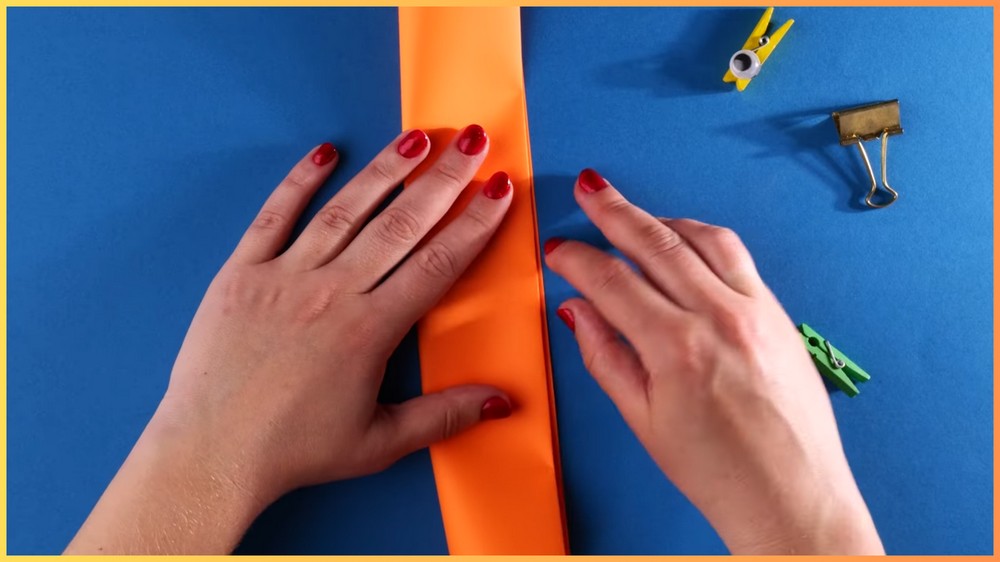
Begin by folding the paper in half. Take the left edge of the paper and bring it over to meet the right edge, ensuring the corners align perfectly. Firmly press down along the crease with your fingers or use a blunt edge (like the back of scissors) to make the fold sharp and flat.

Next, fold the paper again, but this time fold it in the same direction as the first fold. This will result in a narrower folded strip of paper. Repeat the folding process until the folded strip is compact but thick enough to cut into designs. The more folds you create, the more pumpkins will appear in your decoration.
Step 3: Pencil Design
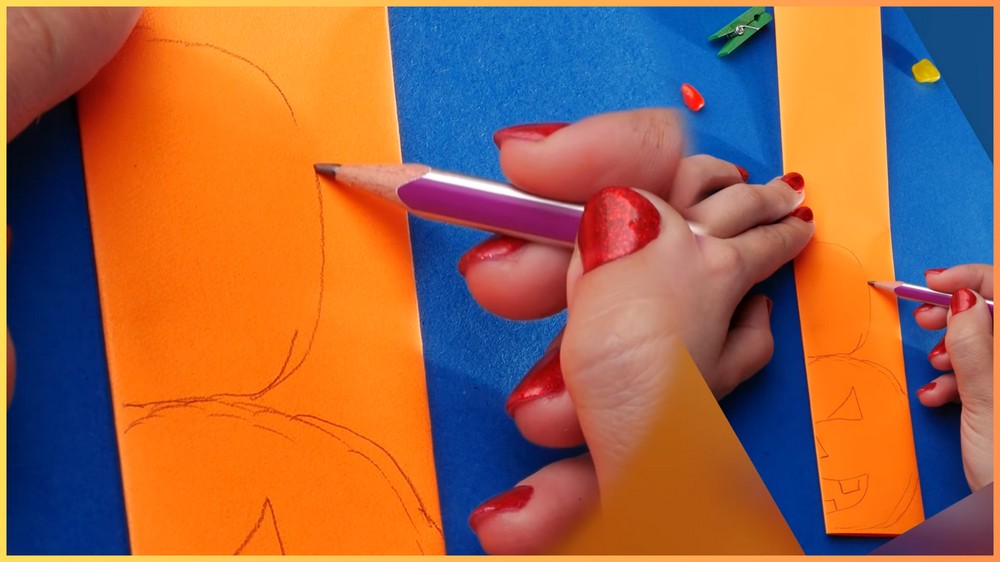
Once your paper is folded and ready, take a pencil and start sketching the design directly onto the folded surface. Begin at the bottom:
- Draw the pumpkins:
- At the very bottom (the base of the folded paper), sketch a large, rounded pumpkin shape. Add curved lines or ridges to give your pumpkin texture.
- Above the first pumpkin, draw a slightly smaller one, stacking it right on top. The pumpkins should overlap slightly in your drawing to ensure they stay connected when cut.
- Continue sketching more pumpkins above the first two. Aim for five pumpkins in total, gradually decreasing the size as you go up. The small ones at the top will create a whimsical stacked effect.
- Add the hat design:
- At the very top (above the smallest pumpkin), draw a fun hat! This could be a witch’s hat with a curved tip, a party hat, or even a silly top hat. Be bold and creative with the patterns! You can include stars, stripes, or any Halloween-inspired details.

Step 4: Cut Out the Design
Now that your design is complete, grab your scissors. Carefully cut along the pencil lines you’ve drawn, taking your time around rounded edges and intricate curves like the hat’s tip. Do not cut through the folded edges that connect the pumpkins, as this will ensure all the pumpkins stay attached in a cascading chain-like design.
If the paper feels thick due to multiple folds, cut slowly to avoid tearing it. As you work, brush aside scraps to keep your workspace tidy.

Step 5: Unfold the Paper
Once you’re done cutting, it’s time for the big reveal! Carefully open up the folds. Pull gently at the corners to avoid ripping the connected sections of the pumpkins. As you unfold, you’ll see your funny pumpkin stack come to life.
The five pumpkins should remain connected at their sides, forming a garland-like decoration with a hat at the very top. Smooth out any crumples or uneven folds in the paper for a polished appearance.’

Note: If you face any hurdles in creating this project, then you can watch the tutorial here.
Step 6: Add Creative Touches (Optional)
If you want to take your craft to the next level, grab markers, stickers, or glitter and decorate the pumpkins. You can draw funny faces on each pumpkin: one might have a smile, another might have spooky teeth, and another might be winking. Add patterns to the hat or color in some parts to make the design more vibrant and unique.
This step adds a personal touch and makes them even more festive for Halloween parties or displays.
Step 7: Display Your Craft
Your funny pumpkin chain with hats is now complete! Hang it on a wall, use tape to attach it to a door, or drape it across a table for Halloween-themed décor. Alternatively, use it as a fun hanging garland for windows or stair railings. The playful pumpkins are bound to brighten up your space and make your Halloween atmosphere cheerful and spooky.
