
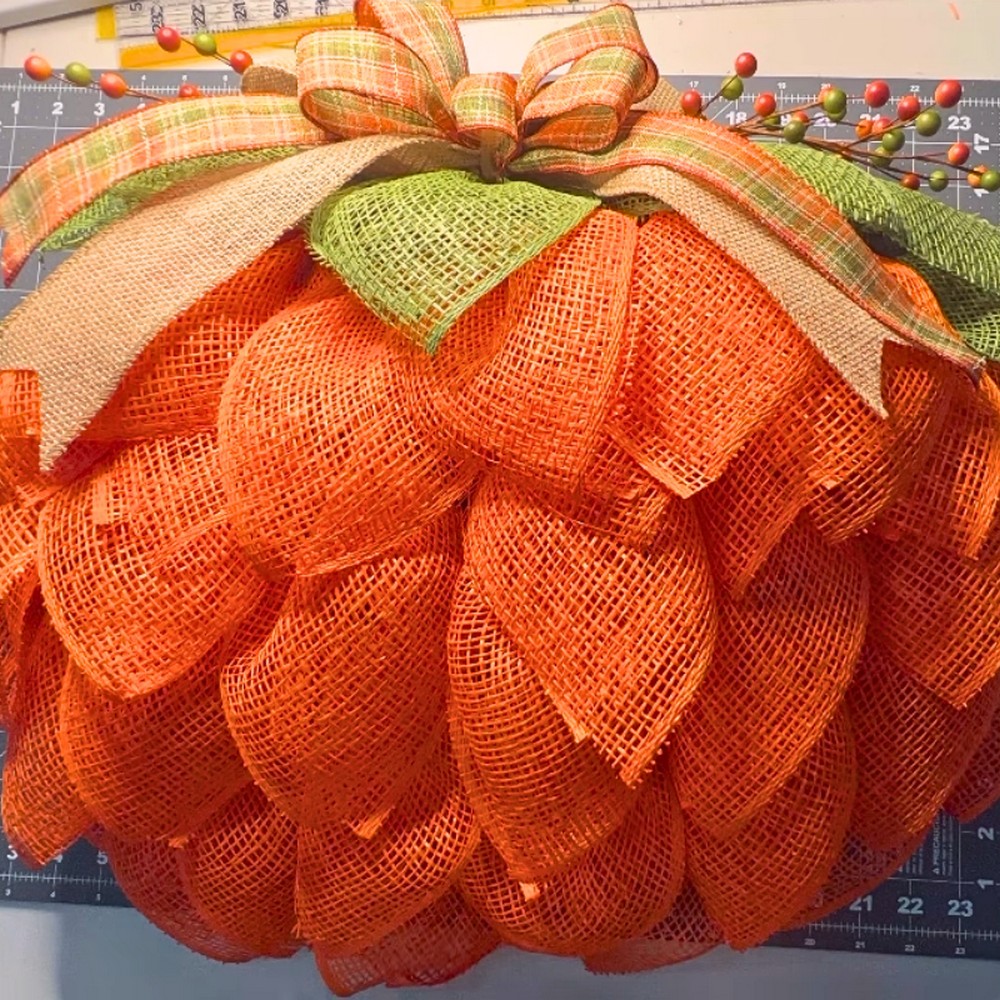
A pumpkin wreath is a beautiful fall decoration that is perfect for brightening up your home. Shaped like a cheerful pumpkin, it brings seasonal joy to your door, wall, or any space you want to liven up with autumn vibes. Making one is not only fun but also allows you to create something special that lasts for years. It’s perfect for family crafting or adding a handmade touch to your home decor.
Practical Uses & Making Process
This wreath starts with a wire pumpkin frame, which you can find at budget-friendly stores. By using soft poly mesh and a handy wood-burning tool, you can cut the mesh into neat pieces that keep their edges clean and tidy. You’ll layer these mesh pieces into petals, giving the wreath a full, textured look. Zip ties keep everything securely in place, and adding leaves and a stem gives it the final pumpkin touch. Decorate the wreath further with ribbons or fall-themed picks to give it personality and charm. Whether hanging it on your door or gifting it to someone, this wreath brings a warm seasonal beauty.
Why You’ll Love It
This pumpkin wreath is an easy and rewarding craft that lets you customize colors and extras like bows or foliage. Whether you’re adding it to your holiday decorations or gifting it, it’s a great way to show your creative side and celebrate autumn. Plus, crafting together can be a fun activity for family and friends.
Credit Hollie Hobbies
Required Materials:
- Pumpkin wire wreath frame (Dollar Tree)
- Soft poly deco mesh (two rolls in orange and one roll in green)
- Wood burning tool (with a chisel tip)
- Tempered glass cutting surface
- Zip ties or Chanel stems (assorted sizes, preferably orange for blending)
- Wire cutters
- Floral wire
- Floral picks (optional for leaves and decorations – Hobby Lobby picks were used in the video)
- Hot glue gun and glue sticks
- Ribbon for bow (fall-themed: 2.5-inch, 2-inch, and 1.5-inch ribbons)
- Cutting mat (with measurements visible)
- Scissors

Important Notes:
- Tempered Glass is mandatory when using the wood burning tool as a cutting surface. Regular glass will not work due to heat exposure risks.
- Always cut the mesh with the wood-burning tool to seal the edges and minimize fraying.
- Keep positioning of the “finished edges” of the mesh consistent throughout the project for a polished look.
- Zip ties placement is crucial. Make sure they’re tight enough to secure the petals but don’t flatten the aesthetic.
- Adjust and fluff petals and decorations as you proceed to ensure the desired final shape.
Step-by-Step Instructions:
Step 1: Preparing the Deco Mesh
- Heat up your wood burning tool and ensure your tempered glass is ready as the cutting surface.
- Cut the orange soft poly mesh into 10-inch pieces. You’ll need approximately:
- 4 petals per bar on 6 vertical bars (total: 24 pieces).
- 2-3 petals for the shorter horizontal bars.
- If one roll of mesh isn’t enough, have a second roll ready.

Step 2: Making Daisy Petals
- Lay a 10-inch piece of mesh curl side up.
- Create a triangle by folding the finished edge slightly over the unfinished edge.
- Ensure the finished edge slightly overlaps the unfinished one for a neat appearance.
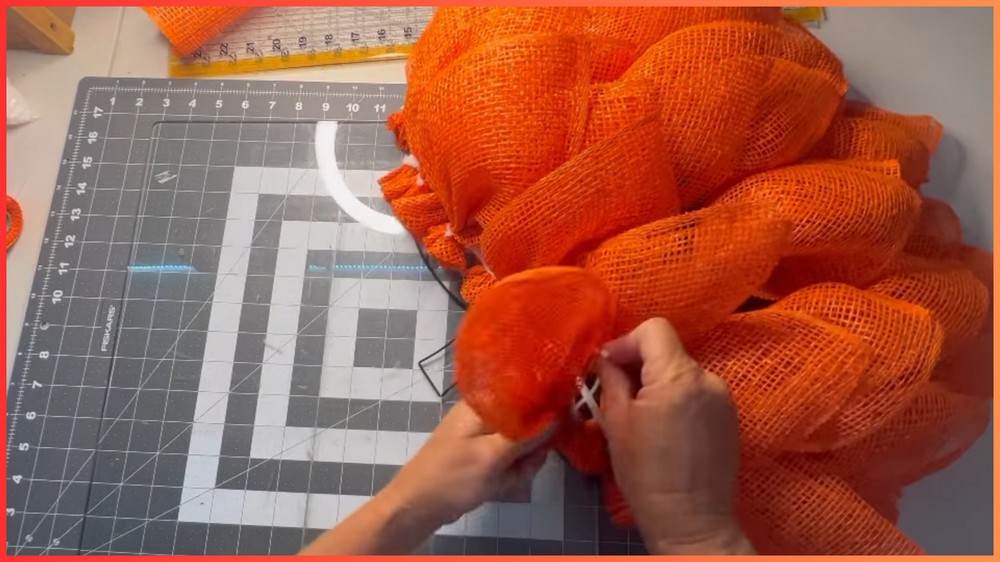
- Gather and pinch the bottom of the triangle to create a “Daisy petal” shape.
- Secure the petal to the 3D bar of the wireframe using a zip tie, leaving about 0.75-1 inch of the petal’s pointed end extending past the bar.
Step 3: Attaching Petals to the Pumpkin Wreath Frame
- Attach 4 petals per 3D bar of the pumpkin wireframe.
- Layer petals slightly over one another for a full, cohesive look.
- For the horizontal side bars, attach only 2 petals each to fill gaps.
- Angle the petals slightly to cover any exposed empty spaces.

Step 4: Adding Dimension
- Flip the frame over and attach pipe cleaners across the back of the frame diagonally to form a ridge for added support.
- Flip the frame back over and add 5 more petals to this new ridge to enhance fullness:
- Alternate petals’ finished edges on the right and left, ensuring consistency with the other petals.
Step 5: Creating the Leaves
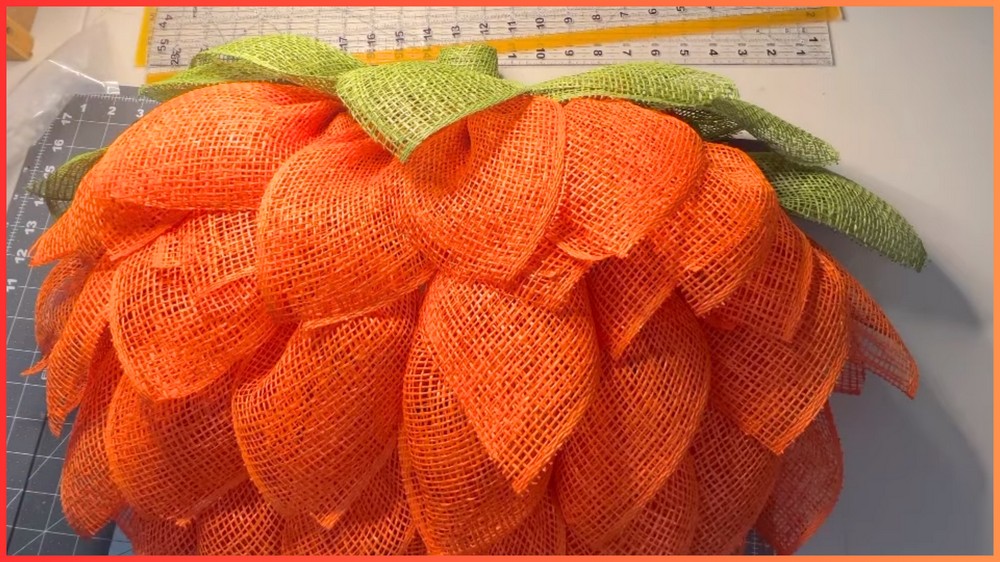
- Switch to the green deco mesh and cut approximately 8-10 pieces at 10 inches each.
- Repeat the petal-making process with the green mesh to create leaves.
- Attach the green petals at the top of the pumpkin frame (near the “stem” of the pumpkin):
- 3 petals on each side angled downward to cover zip ties.
- 1 petal in the center to add fullness.
Step 6: Creating the Stem
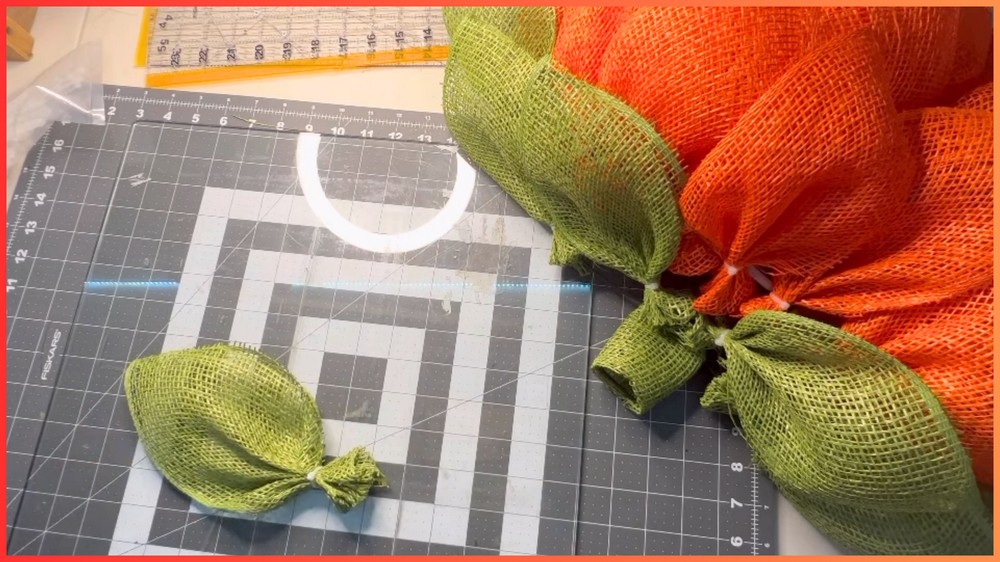
- Use a green tube or roll up a scrap of green mesh.
- Secure it to the middle bar of the wireframe using zip ties. Ensure it overlaps enough to fully cover the metal bar.
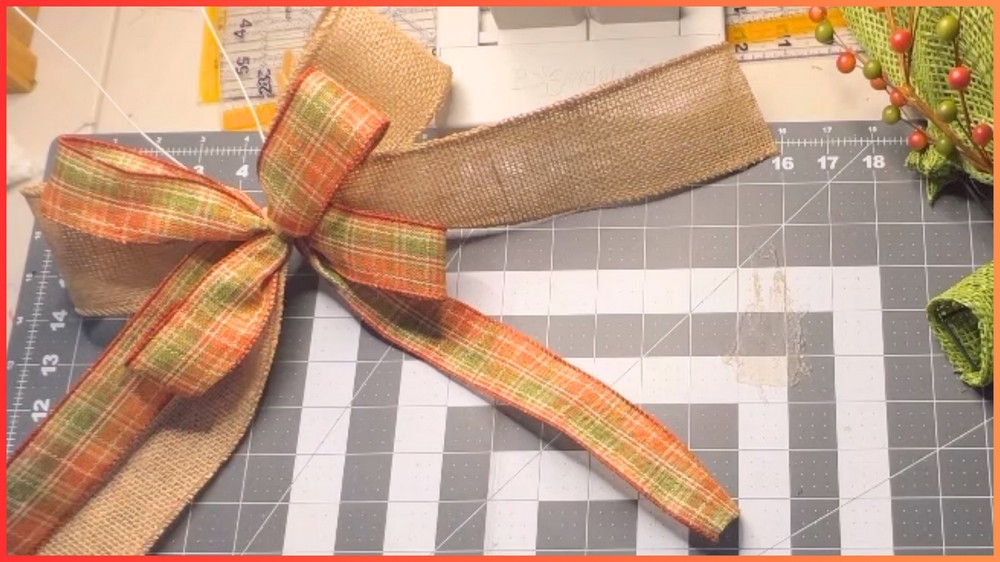
Step 7: Creating and Attaching the Bow
- Use fall-themed ribbons (2.5-inch, 2-inch, and 1.5-inch wide ribbons).
- Create a multi-loop bow using a bow maker or by hand:
- Ribbon #1 (burlap): Create two 10-inch loops with 10-inch tails.
- Ribbon #2: Create four 8-inch loops with 10-inch tails.
- Use floral wire or zip ties to secure the bow in place.
- Add the bow to the top center of the pumpkin wreath (just above the green mesh leaves).
Step 8: Adding Decorative Picks
- Use floral picks (Hobby Lobby’s fall-themed floral accents were used in the video).
- Secure the picks into place behind the bow by wrapping or twisting their wires to the frame.
- Adjust the floral stems and spread them out for a fuller look.

Step 9: Finishing Touches
- Add a hanger to the back of the frame using Chanel stems or floral wire.
- Attach stems/wire to the top two bars of the frame and twist to create a loop.
- Fluff the petals, bow, and picks for the final polished look.
- Trim any excess zip ties or stray strands of mesh for a neat finish.

Final Result:
A beautiful, full pumpkin wreath perfect for fall décor! Adjust petals and decorations as needed for symmetry, and enjoy your stunning handmade creation.
