
A DIY Halloween lantern is perfect for adding a spooky glow to your home. These lightweight, handmade jack-o’-lanterns are not just festive but also completely customizable in size and design. You can make one for a cozy corner or create a glowing set to complete your Halloween decorations. This project is fun, versatile, and brings the Halloween spirit to life with a unique, personal touch.

Easy and Spooky DIY Halloween Lantern Tutorial
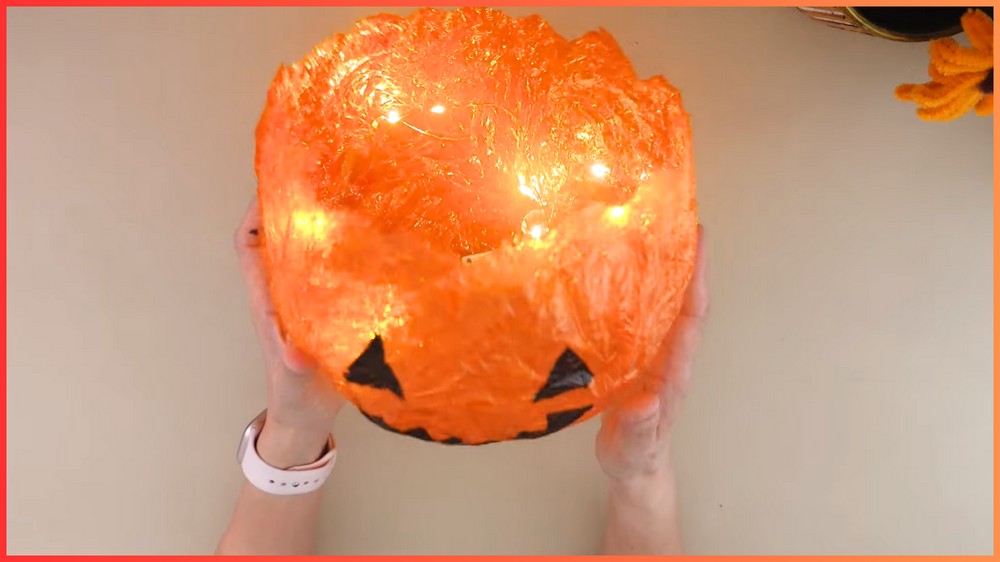
Making these lanterns is super simple. Start with a balloon, some orange glass paper, and glue. Layer the glass paper over the balloon, shaping it carefully to give it that classic pumpkin look. Once dried, deflate the balloon, trim the edges, and add your spooky or cute jack-o’-lantern face using a marker. Pop in a tea light or fairy lights, and watch it glow! Since the material is light, consider adding a small weight inside if you need it to stay put.
These lanterns work beautifully as table decorations, window displays, or even a glowing centerpiece for your Halloween night. They’re easy to make, fun to customize, and bring a little extra magic to the season.
Credit Happy Wabby
Materials & Tools Needed:
- Balloon – Approximately 18 cm in diameter.
- Orange glass paper – Two pieces, cut to 56 cm x 56 cm.
- Clear glue – Liquid-based, suitable for crafting.
- Brush – For spreading the glue evenly.
- Scissors – For cutting glass paper and shaping edges.
- Acrylic marker – For drawing the jack-o’-lantern face.
- Hair dryer – Optional, to speed up drying process.
- Fairy lights or tea lights – For illumination.
- Small coaster or weight – To stabilize the lightweight craft.
Finished Size & Customization Ideas:
- Finished Lantern Size: Roughly the size of the original balloon used (about 18 cm diameter).
- Customization Ideas:
- Make lanterns in other sizes by adjusting the balloon size.
- Choose other colors of glass paper (e.g., white for ghosts or green for monster faces).
- Experiment with different face designs to create various spooky characters.
- Add glitter, stickers, or textures for a unique look.

Step-by-Step Detailed Instructions:
1. Balloon Preparation
- Inflate your balloon to approximately 18 cm in diameter.
- Leave enough room for the balloon to hold its shape but remain slightly flexible.
2. Preparing the Orange Glass Paper
- Cut two pieces of orange glass paper, each measuring 56 cm x 56 cm.
- Examine all edges to ensure they are cut evenly for smooth wrapping.

3. Wrapping the Balloon
- Apply clear glue all around the surface of the balloon.
- Use a brush to spread the glue evenly, ensuring smooth coverage.
- Place the balloon in the middle of one piece of the orange glass paper.
- One by one, stick each corner of the paper to the balloon, pulling and stretching gently to avoid wrinkles.
- Smoothen the surface with your fingers as needed. Apply extra glue if gaps or air pockets are visible.

4. Creating Flaps
- As you wrap the balloon, create four flaps by folding and pressing the sides of the glass paper.
- Trim excess paper from the flaps using scissors.
- Add glue to the edges and press them together to seal any gaps or uneven flaps.

5. Adding the Second Glass Paper Layer
- Repeat the wrapping process with the second piece of orange glass paper:
- Apply glue evenly over the first layer of paper.
- Wrap the second piece and smoothen it out, adding glue wherever needed.
- Cut out the flaps again and ensure all sides are securely glued together.

6. Drying the Lantern
- Leave the balloon in an airy location for 1-2 hours until the glass paper dries completely.
- Optional: Use a hair dryer for about a minute to speed up drying. Ensure the dryer is cool and kept at a safe distance to avoid melting or distorting the balloon.
7. Deflating & Shaping
- Carefully press down on the balloon to release air, ensuring the glass paper maintains its structure.
- Gently pull out the deflated balloon from the hardened glass paper.
- Mold and shape the lantern as needed for a round, sturdy appearance.
8. Trimming the Zigzag Pattern
- Use scissors to trim the top opening of the lantern into a zigzag pattern, resembling the top of a carved pumpkin.
- Cut carefully for a clean, symmetrical design.
9. Drawing the Jack-o’-Lantern Face
- Use an acrylic marker to draw the classic jack-o’-lantern face:
- Add triangular eyes.
- Draw a nose (optional).
- Create a spooky or cheerful mouth (customize the style to your liking).
- Allow the marker details to dry completely.

10. Adding Lights & Weight
- Place fairy lights or tea lights inside the lantern for a glowing effect.
- To stabilize the lightweight lantern, place a small coaster or heavy object at the bottom.

Final Touches
- Display the finished lantern as a standalone decoration or part of a spooky set.
- Experiment with different sizes and designs to create a pumpkin family for your Halloween décor!

