Unleash your creativity with these adorable DIY paper bows! This craft project is perfect for anyone who loves quick and simple ideas that yield stunning results. Using recycled or decorative paper, you can create beautiful bows that are as versatile as they are charming. Whether you’re a seasoned crafter or just looking for a fun activity to try at home, this project is beginner-friendly, budget-friendly, and endlessly customizable.
DIY Paper Bows
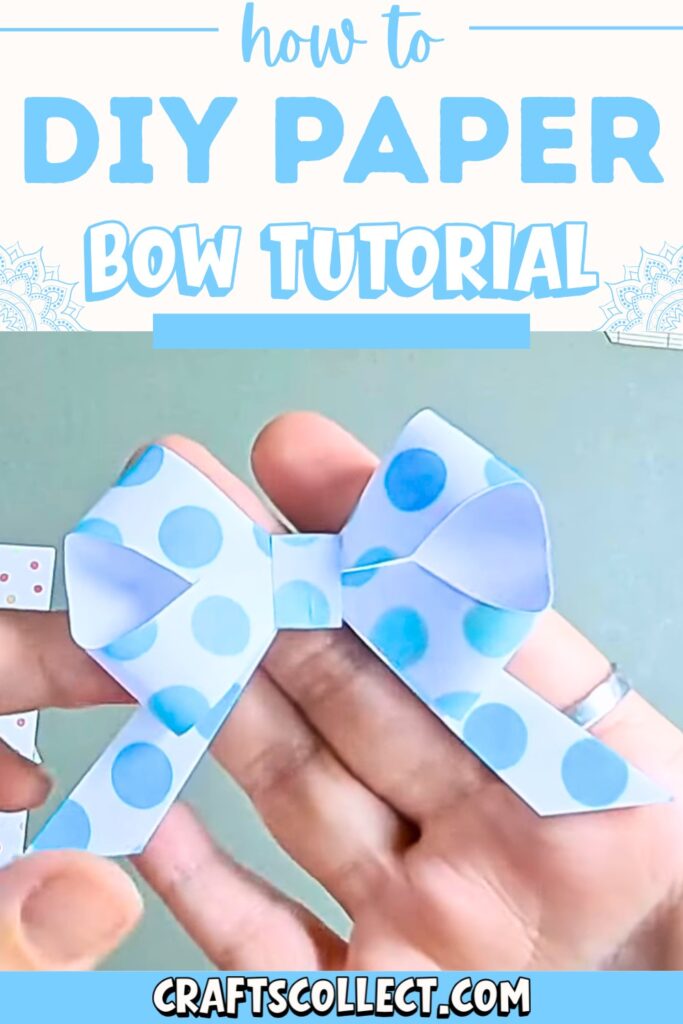
This easy step-by-step craft shows you how to transform a square piece of paper into a lovely bow with just a few folds, snips, and some tape. The unique design and flexibility of this project make it stand out—you can adapt it for gift wrapping, home decor, or even holiday decorations. Plus, it’s kid-friendly, making it a perfect activity for the whole family. These personalized bows are also an excellent way to add a handmade touch to any gift or event. Quick to create and fun for everyone, this craft opens the door to endless creative possibilities!
Credit DIY Craft Hub
How To Make Paper Bows
Required Materials:
- Square piece of paper (any size – larger paper for larger bows).
- Round object (e.g., a circular base or stencil) – used to draw curves.
- Pencil – for tracing the curves and guidelines.
- Scissors – to cut the paper.
- Double-sided tape – to secure the bow.
Important Notes:
- Paper choice: You can use any type of paper, including recycled materials. Patterned or colored paper adds a decorative touch.
- Custom sizes: The size of the paper will directly affect the size of the bow, making this craft highly versatile.
- Sharp scissors: Ensure your scissors are sharp to create clean cuts for the bow design.
- Child-friendly: This is an easy craft that children can also enjoy with some supervision.

Detailed Step-by-Step Instructions:
Prepare the Paper
- Start with a square piece of paper.
- Fold the paper diagonally both ways (corner to corner) to create an “X” crease.
- Next, fold the paper in half lengthwise to create a “+” crease.

Shape the Paper
- Take a round object (like a circular stencil or small plate) and place it on the edge of the square paper.
- Align it centrally, then trace a shallow curve along the top edge of the paper using the pencil.
- Cut along the curve you just drew.
- Trim the corners diagonally, but ensure that one side is longer than the other (this will help create the bow shape).
Prepare the Cut-Out
- Unfold the paper to reveal the shape. It should now look like a bow template.
- Draw two lines on the paper, starting from the center and extending outward on either side of the folded vertical line. Stop when the lines meet the diagonal folds.
- Using scissors, cut along the lines you just drew and along the central vertical fold, removing the middle piece.

Start the Bow Shape
- Cut along each diagonal fold on the paper, stopping just before the center.
- Apply a small amount of double-sided sticky tape to the center of the paper.
- Fold each of the four corners into the middle, pressing them down onto the tape.

Finish the Bow
- Turn the bow over and apply another small piece of double-sided tape to the center of the unfolded side.
- Fold the “V” shaped section at the bottom of the paper upwards and stick it to the center.
- Use scissors to trim the bottom edge and clean up any excess or uneven edges.

Final Notes:
Your bow is complete! Use it to decorate gifts, holiday trees, or any other craft project. This is a versatile and straightforward craft that’s enjoyable for all ages – have fun experimenting with different patterns and sizes.
