
This cheerful paper pumpkin puppet brings tons of fun right to your hands. Crafted from paper, this craft turns a single flat sheet into a cute jack-o’-lantern with a mouth that opens and closes. It works wonderfully as a finger toy, party favor, or silly desk decor for Halloween that brightens any room.

Biting Paper Pumpkin Craft
Crafting this biting pumpkin is an enjoyable activity for kids and adults alike. It offers a great way to practice neat paper folds while creating something interactive. You can make several in different colors to build a whole family of playful pumpkin friends for Halloween games, story time, or classroom fun.
Creating this fun project only takes a single 15×15 cm piece of paper and a black marker. Sharp, tidy folds create the 3D shape and biting mouth. Once the main body is folded, drawing classic eyes and a nose brings the character to life, giving it a playful personality everyone will enjoy seeing.
You can use these biting paper pumpkins as table decorations for a festive Halloween party or as sweet surprise gifts for friends. Kids can fit their fingers in the back to make the mouth bite and talk, turning a basic sheet of paper into a lively friend for endless fun throughout the season.
Things that you need before crafting:
Paper: 1 square sheet of paper (15 cm × 15 cm) in orange.
Accent Paper: Small paper strip (green or brown) for the pumpkin stem.
Marker: Black permanent or fine-tip marker for facial features.
Adhesive: Craft glue or glue stick (to attach the stem).

This Project credit goes to Paper Art | Origami.
Key Construction Features
Grid Base: Built upon a symmetrical 4×4 creased base grid.
Hinge Mechanism: Uses corner squash-folds to form an inner mouth cavity.
3D Action: Squeezing the back edges opens and closes the jaws in a “biting” motion.
Customizable Details: Add custom eyes, teeth, and stems for unique expressions.
How To Make:
Step 1: Preparing the 4×4 Base Grid
Begin with your square sheet of paper placed flat on a smooth surface, colored side facing down if using single-sided paper. Fold the sheet in half horizontally from bottom to top, crease sharply using your thumbnail or a bone folder, and unfold it flat. Next, bring the top edge down to the central crease line, fold and crease, then bring the bottom edge up to meet the same center line and crease smoothly.

Unfold both top and bottom flaps completely. Rotate the paper 90 degrees and repeat the entire sequence: fold in half vertically, unfold, then fold the left and right outer edges inward to meet the center line. When you open the paper back out completely, your sheet will display a perfectly uniform grid of sixteen small squares.
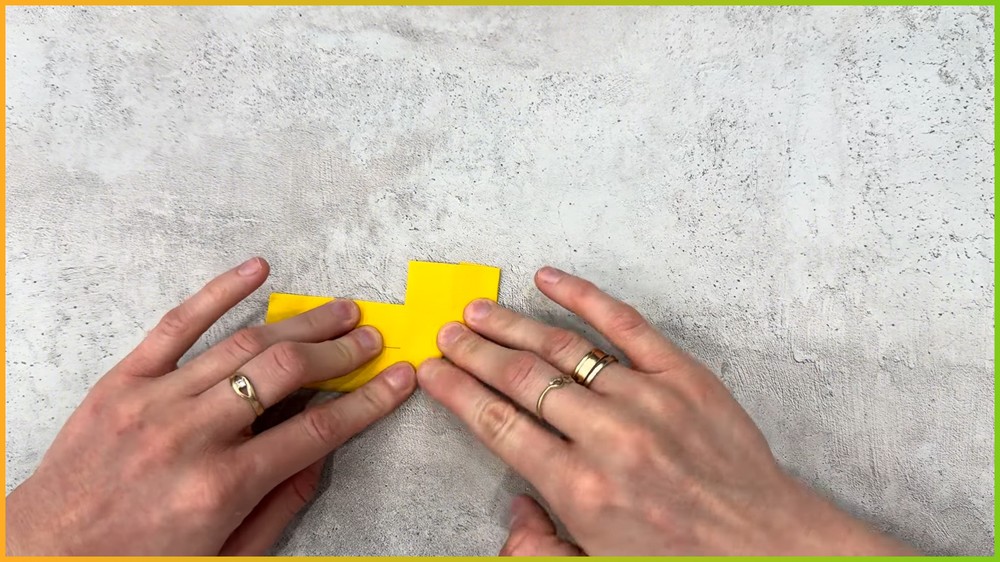
Step 2: Collapsing the Edges and Constructing Corner Pockets
With your grid established, fold the top and bottom horizontal sections inward along the established grid creases so they lie flat against the center. Take the left and right outer edges and fold them inward to meet at the vertical middle line, creating a compact rectangle with layered folds. Next, work on each of the four outer corners individually to construct the structural hinges.

Insert your finger under the open outer flap of a corner, gently pull the layers apart, and press down evenly to squash-fold the corner flat into a neat, symmetrical triangular pocket. Once all four corners are squash-folded flat, fold the sharp outer tips of these triangles inward toward the central horizontal line; this locks the internal structural layers together and prevents the paper from unravelling during movement.
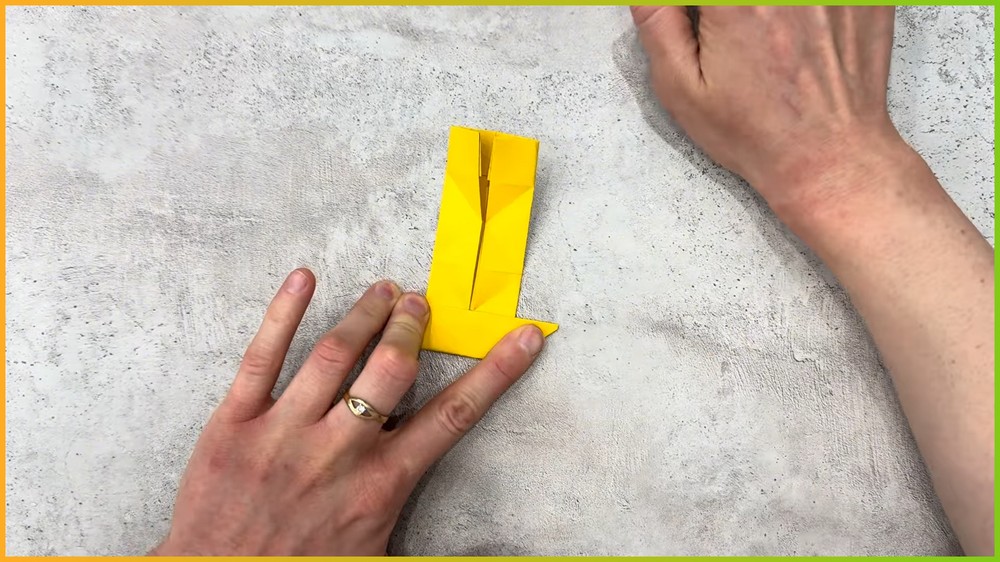
Note: If you face any hurdles in creating this project, then you can watch the tutorial here.
Step 3: Sculpting the 3D Biting Mechanism and Final Finishing
Turn the folded paper assembly over so the central opening and folded seam face directly toward you. Gently pull the upper and lower halves away from each other while applying a crisp mountain-fold along the horizontal center line, causing the interior paper to push outward and expand into a hollow 3D cavity. Carefully pinch and contour the outer side edges inward, rounding out the silhouette so the top and bottom sections align into interlocking upper and lower “jaws.”

Test the mechanical action by squeezing the side folds together from the back—the front opening will spring open and snap shut in a biting motion. To finish your Jack-O’-Lantern, cut a small rectangular strip of green or brown accent paper, apply a dab of glue, and adhere it to the top edge to serve as the stem. Finally, take your black marker and draw custom triangular eyes, nose, and jagged teeth along the outer mouth folds to give your biting pumpkin its classic spooky personality.

Save this pin for future!

