Scrap yarn beads are small and colorful creations made from leftover yarn pieces. They’re a simple way to reuse yarn scraps while adding charm to your decorations. These soft, textured beads can be strung together to make a beautiful, bohemian-style garland for your Christmas tree or used independently as fun decorative accents. You can even use them with other materials like wooden beads for a more playful and creative touch.
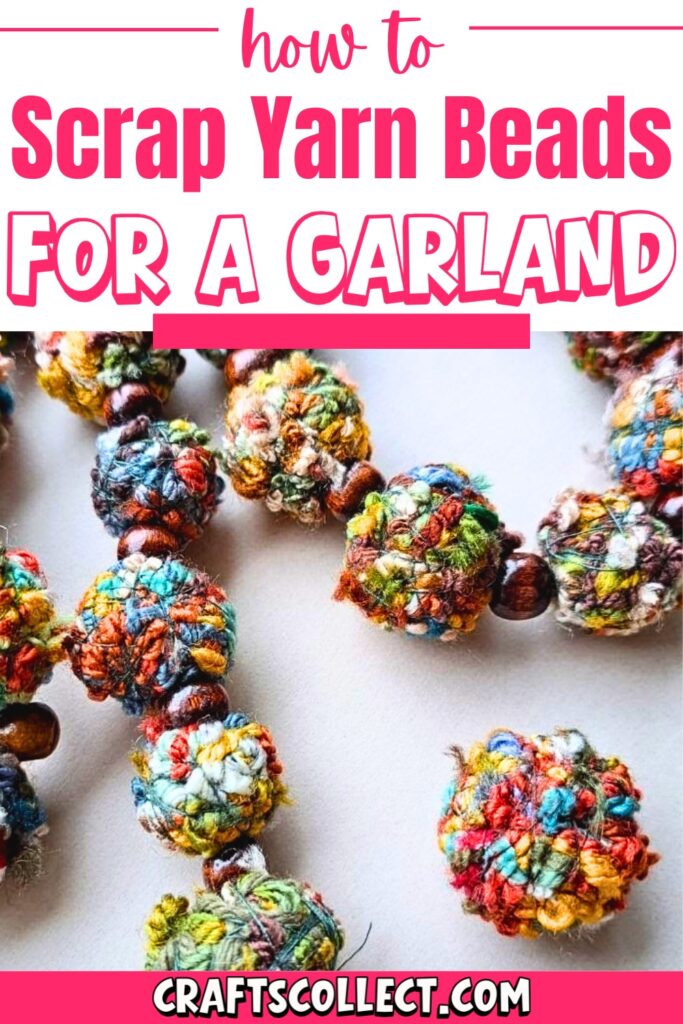
Making them is very easy! All you need are bits of leftover yarn, thread, a needle, and optional beads. Roll the yarn scraps into small balls, secure them tightly with thread, and stitch them together from different angles to hold their shape. Lastly, string them onto yarn or thread to make garlands or anything else you can imagine. Add wooden beads in between for contrast or keep it all yarn—the choice is yours! They are a great activity to do while relaxing or even with kids.
Make your holiday decor colorful, unique, and full of personality with these simple scrap yarn beads. They’re so quick to make, and you’ll love giving your tree a cozy homemade look!
Credit Lucy’s Studio – Make With Me
Materials & Tools Needed
- Scrap Yarn Ends: Any leftover yarn scraps you have on hand.
- Spool of Thread: To tightly wrap and secure the yarn.
- Sewing Needle: Used to stitch the yarn tightly into place.
- Optional Beads: Wooden or other beads to add between your yarn beads for decorative contrast.
- Yarn Needle: A sharp, pointy needle is recommended for threading your beads together.
Important Notes
- You don’t need to worry too much about stray ends in your yarn balls; they can be trimmed off later.
- This is a wonderful, eco-friendly way to use scrap yarn that would otherwise be wasted.
- You can add beads to create a beautiful contrast, but this step is entirely optional.

Step-by-Step Detailed Instructions
Step 1: Prepare Your Yarn Ball
- Gather a handful of your scrap yarn ends. The size of the handful will determine the size of your yarn bead.
- Roll the yarn roughly into a ball shape to serve as the base for your bead.
Step 2: Secure the Ball with Thread
- Place your thread spool into a bowl to prevent it from rolling during the wrapping process.
- Take the thread and wrap it tightly around your yarn ball.
- Continue wrapping the thread, turning the ball as you go, and try to catch any loose ends of the yarn.
- Pull the thread tightly to compact the ball and give it a solid shape.
- Periodically squeeze the ball to ensure it feels tight and rounded.
- If any ends are stubborn and won’t stay down, don’t worry—you can trim them later.

Step 3: Secure the Ball with the Needle
- Cut a long section of thread and thread it into your needle.
- Stitch through the ball from various angles to further secure the layers of yarn and thread.
- Continue stitching until your thread runs out.
- This step ensures the yarn ball will not unravel over time.
Step 4: Trim Loose Ends
- Assess your yarn bead for any stray ends or “sticky-outy” pieces.
- Use scissors to trim down the stray pieces for a neater finish.
- You now have a completed scrap yarn bead!

Step 5: Create a Garland or String Your Beads
- To turn your yarn beads into a garland, take a length of yarn and thread it into a sharp, pointy yarn needle.
- Thread your beads (yarn balls and/or additional wooden beads) onto the length of yarn in your desired arrangement.
- Alternate between wooden beads and yarn beads for a more decorative, contrasting look.
- Continue stringing to achieve your desired garland length.
Final Tips
- These DIY yarn beads offer endless creative possibilities: make jewelry, garlands, ornaments, or any other decorative items!
- This craft is perfect to do with children or while relaxing in front of the television.
- The colorful and textured beads contribute to a vintage, Bohemian aesthetic that pairs beautifully with eclectic or rustic decor themes.

